Sections help you organize your teamwork – as every team is different, there are many ways to use them, depending on the size and structure of your team, the industry you’re in and the volume of tasks your team performs every day. It’s all up to your creativity and project management tactics.
Therefore, Sections may contain various projects your Team is working on, different aspects of your work routine or groups within your Team; you’re free to think of any creative way to use them. Your primary Section is by default named after your Team and displayed in bold typeface above all other Sections.
Entering Sections through your User Profile
You can access any Section in 3 ways – enterign through your User Profile is one of them. To create or edit a Section just go to your User Profile settings (top right corner) and choose Sections:
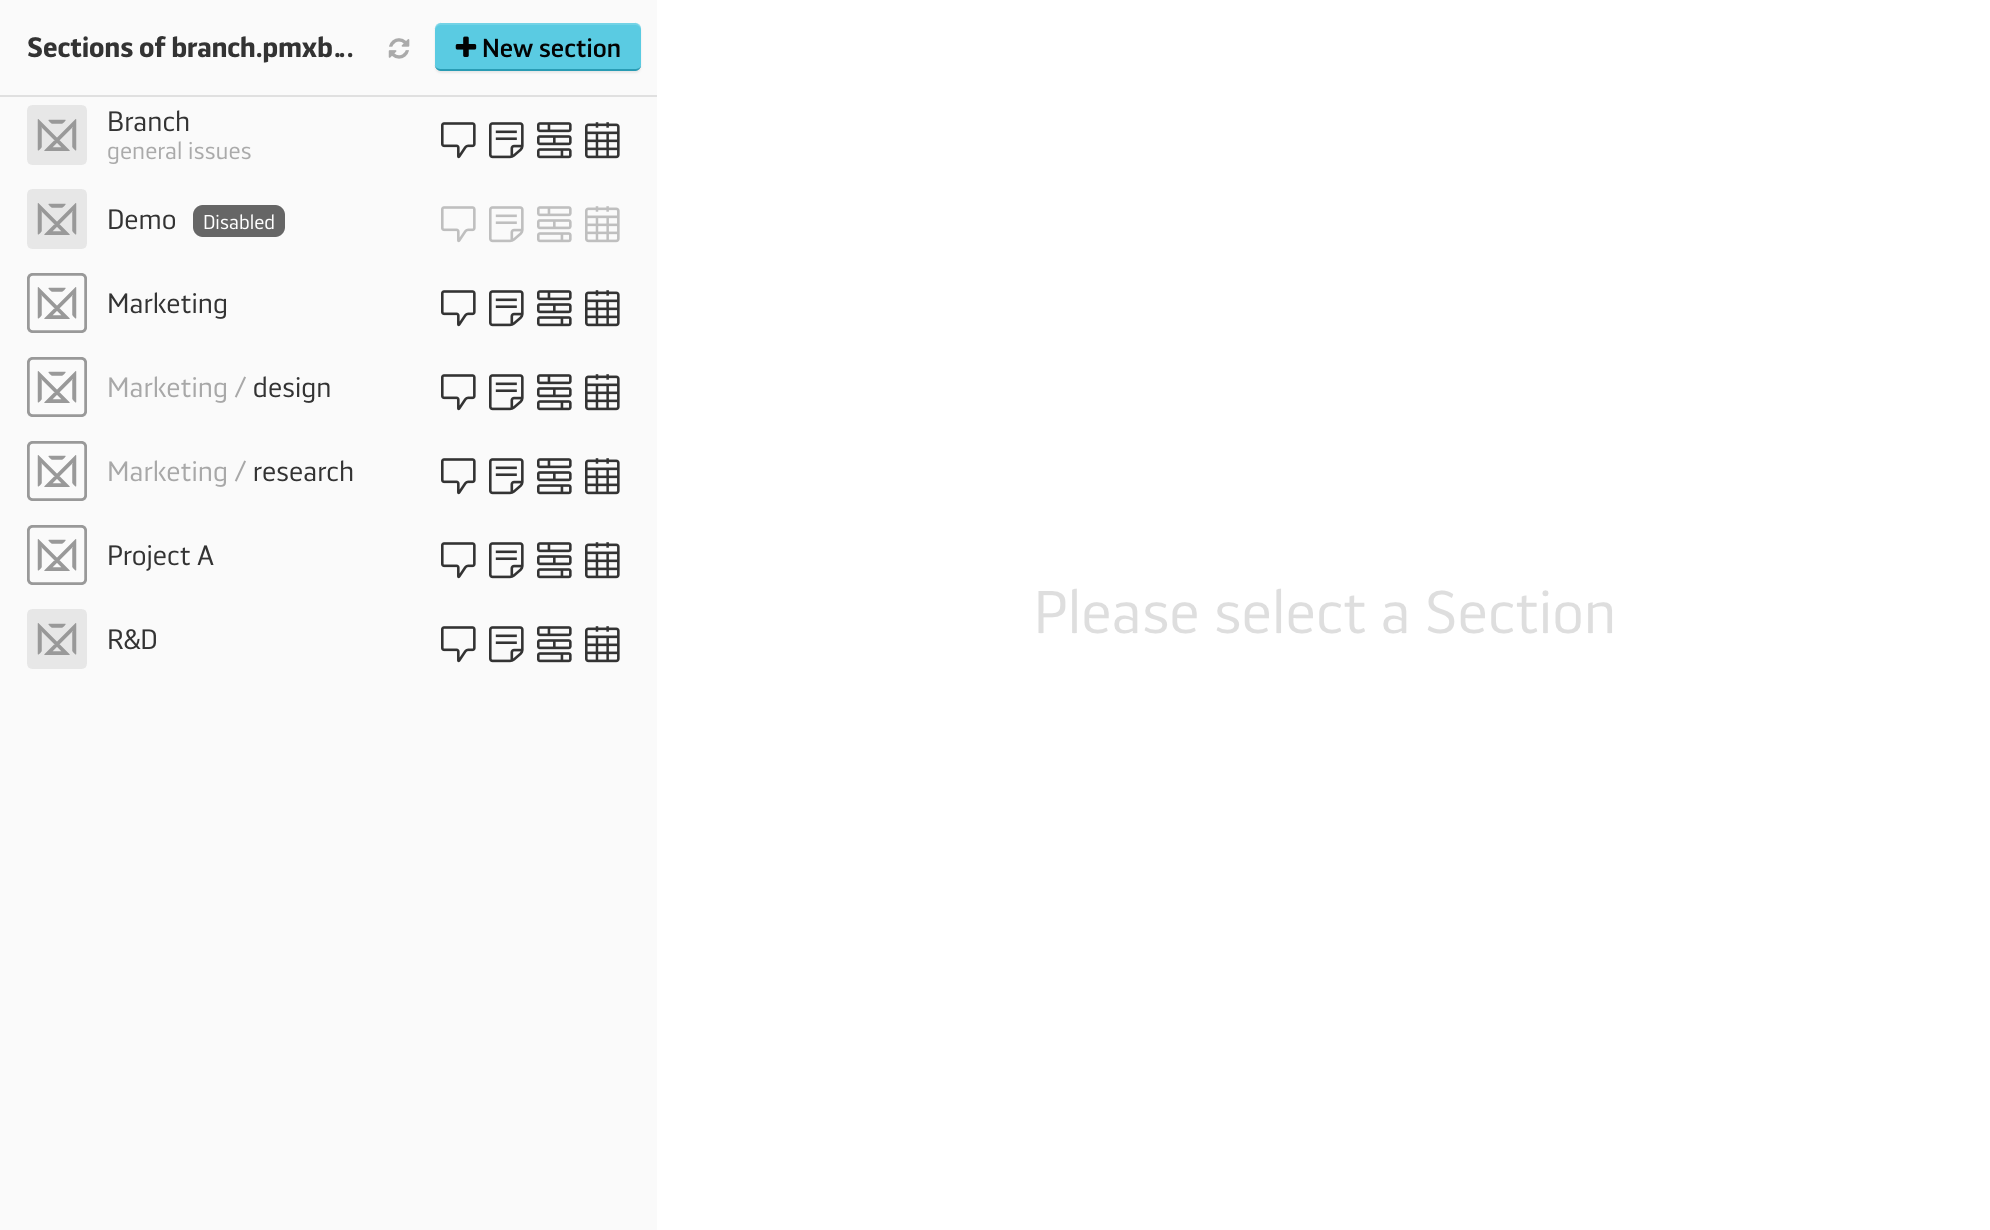
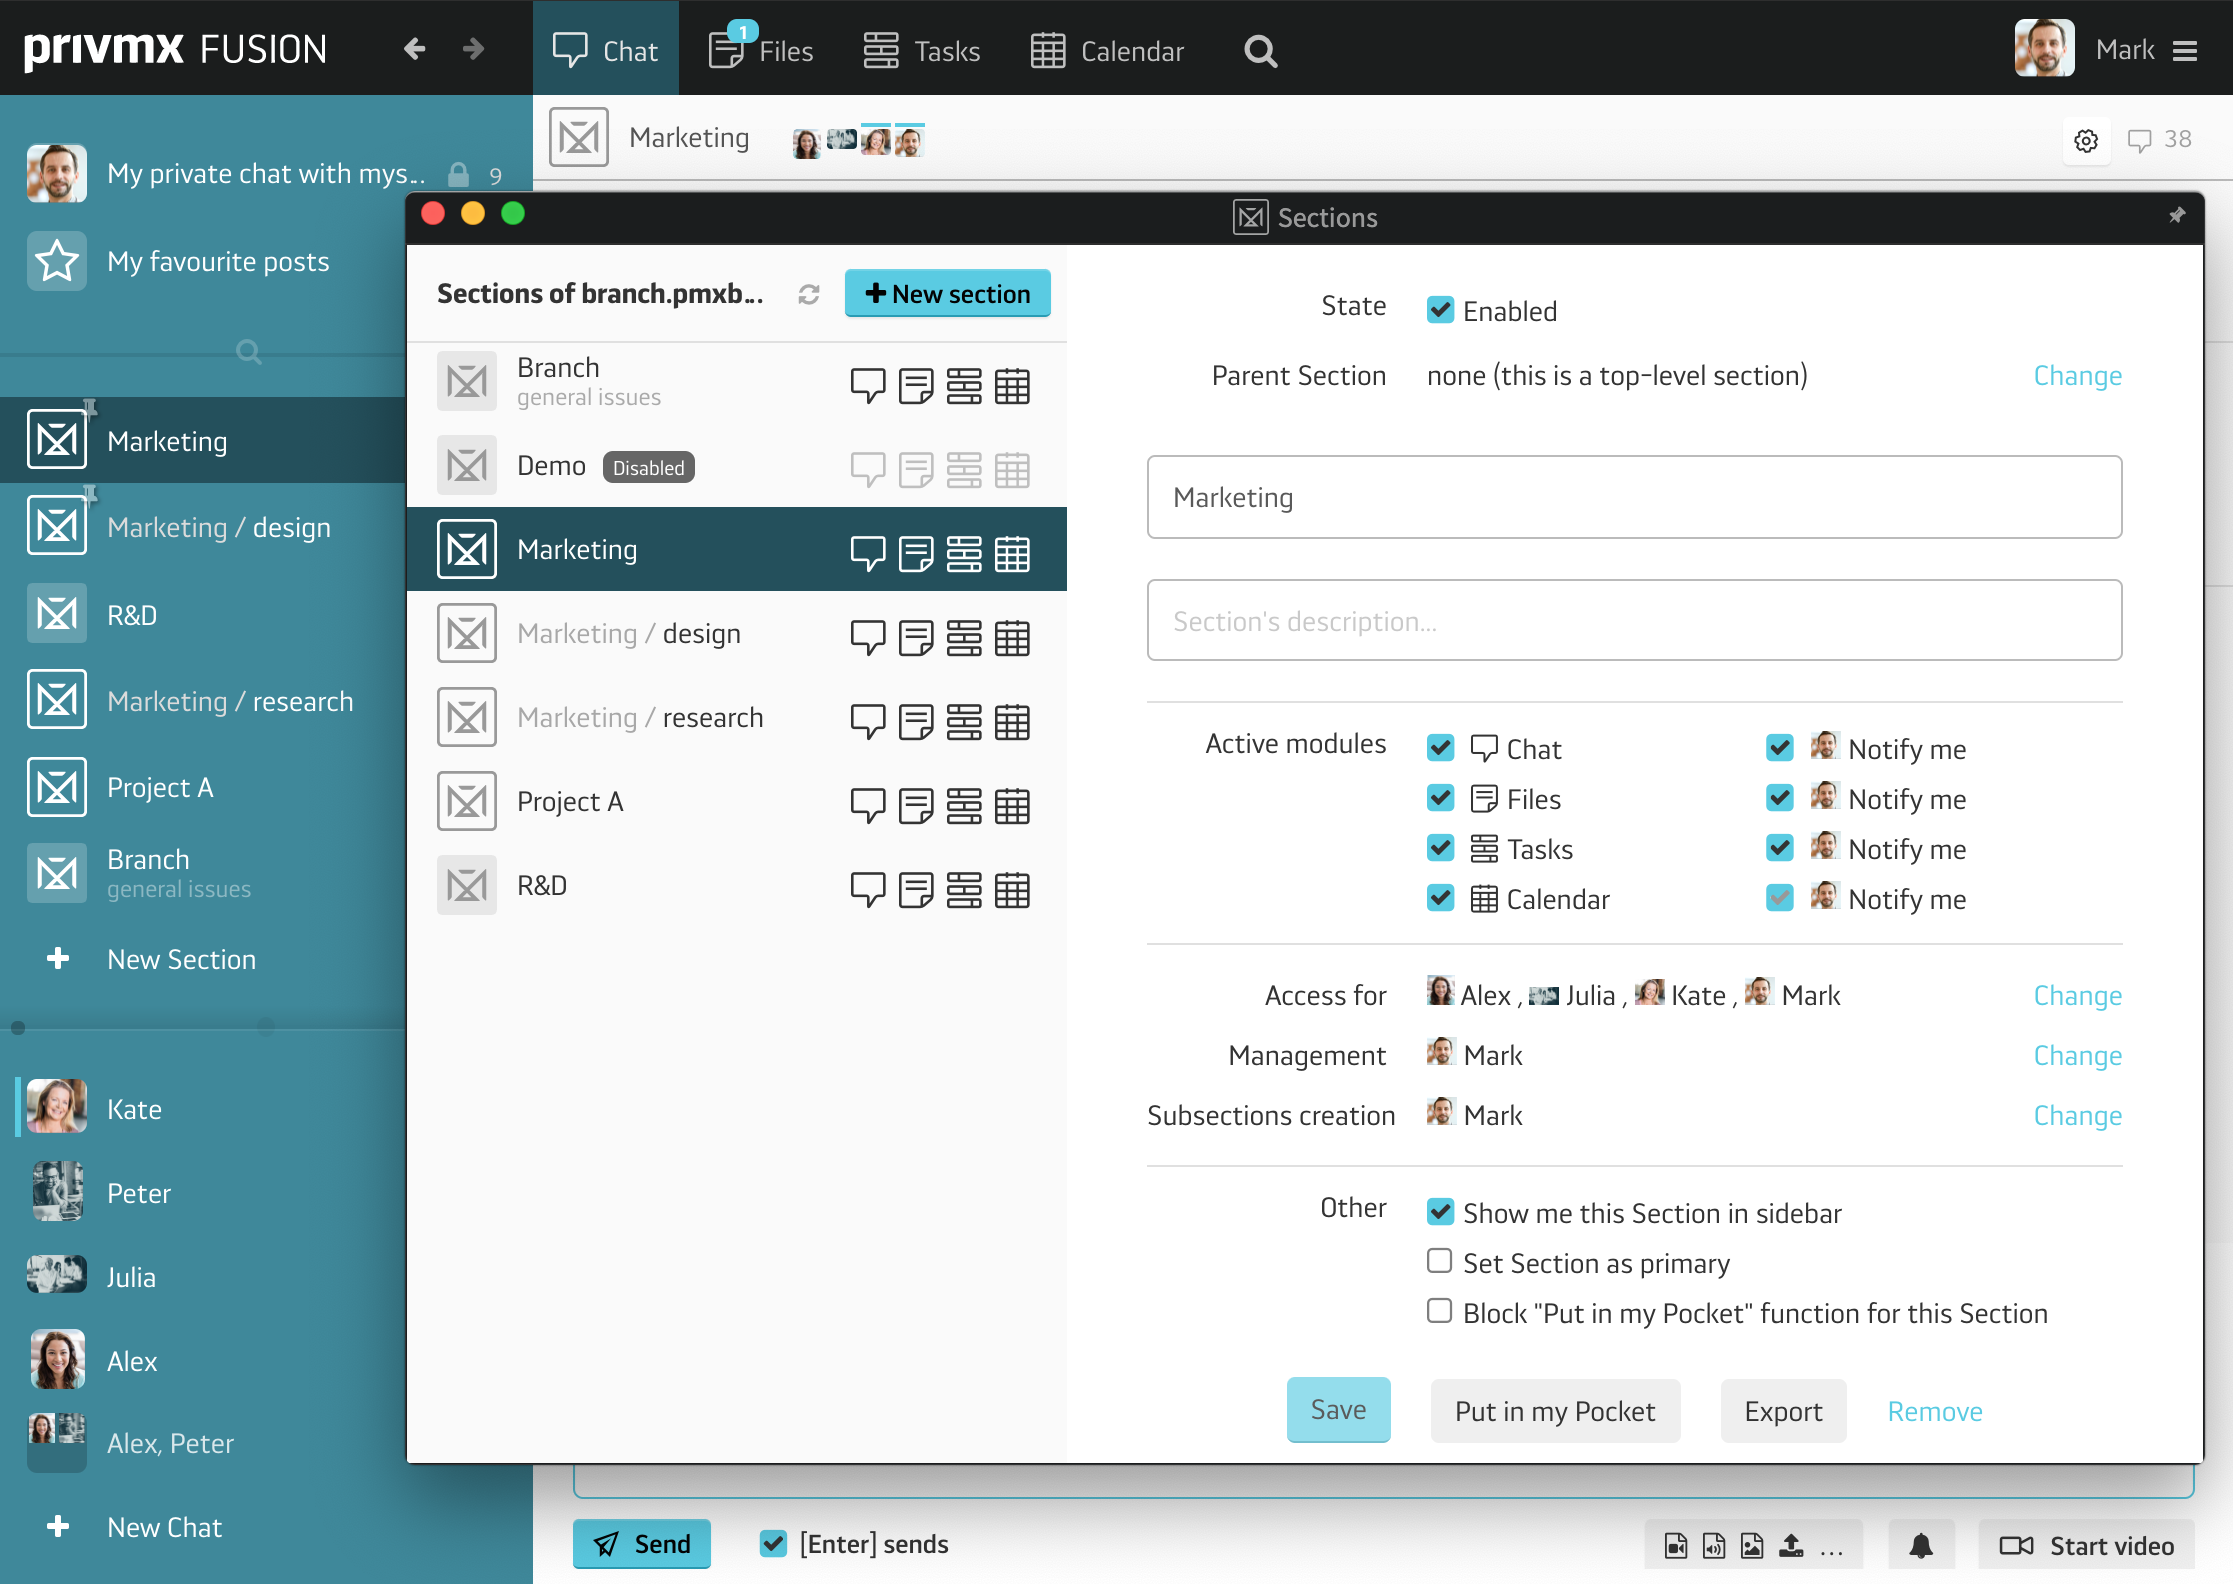
After you open the Section settings, you’ll be able to see all Sections within your Team Server. You’ll also be able to manage settings of particular Sections – by activating Tools’ notifications within each one. You can also decide who can access a Section, manage it and create its Subsections:
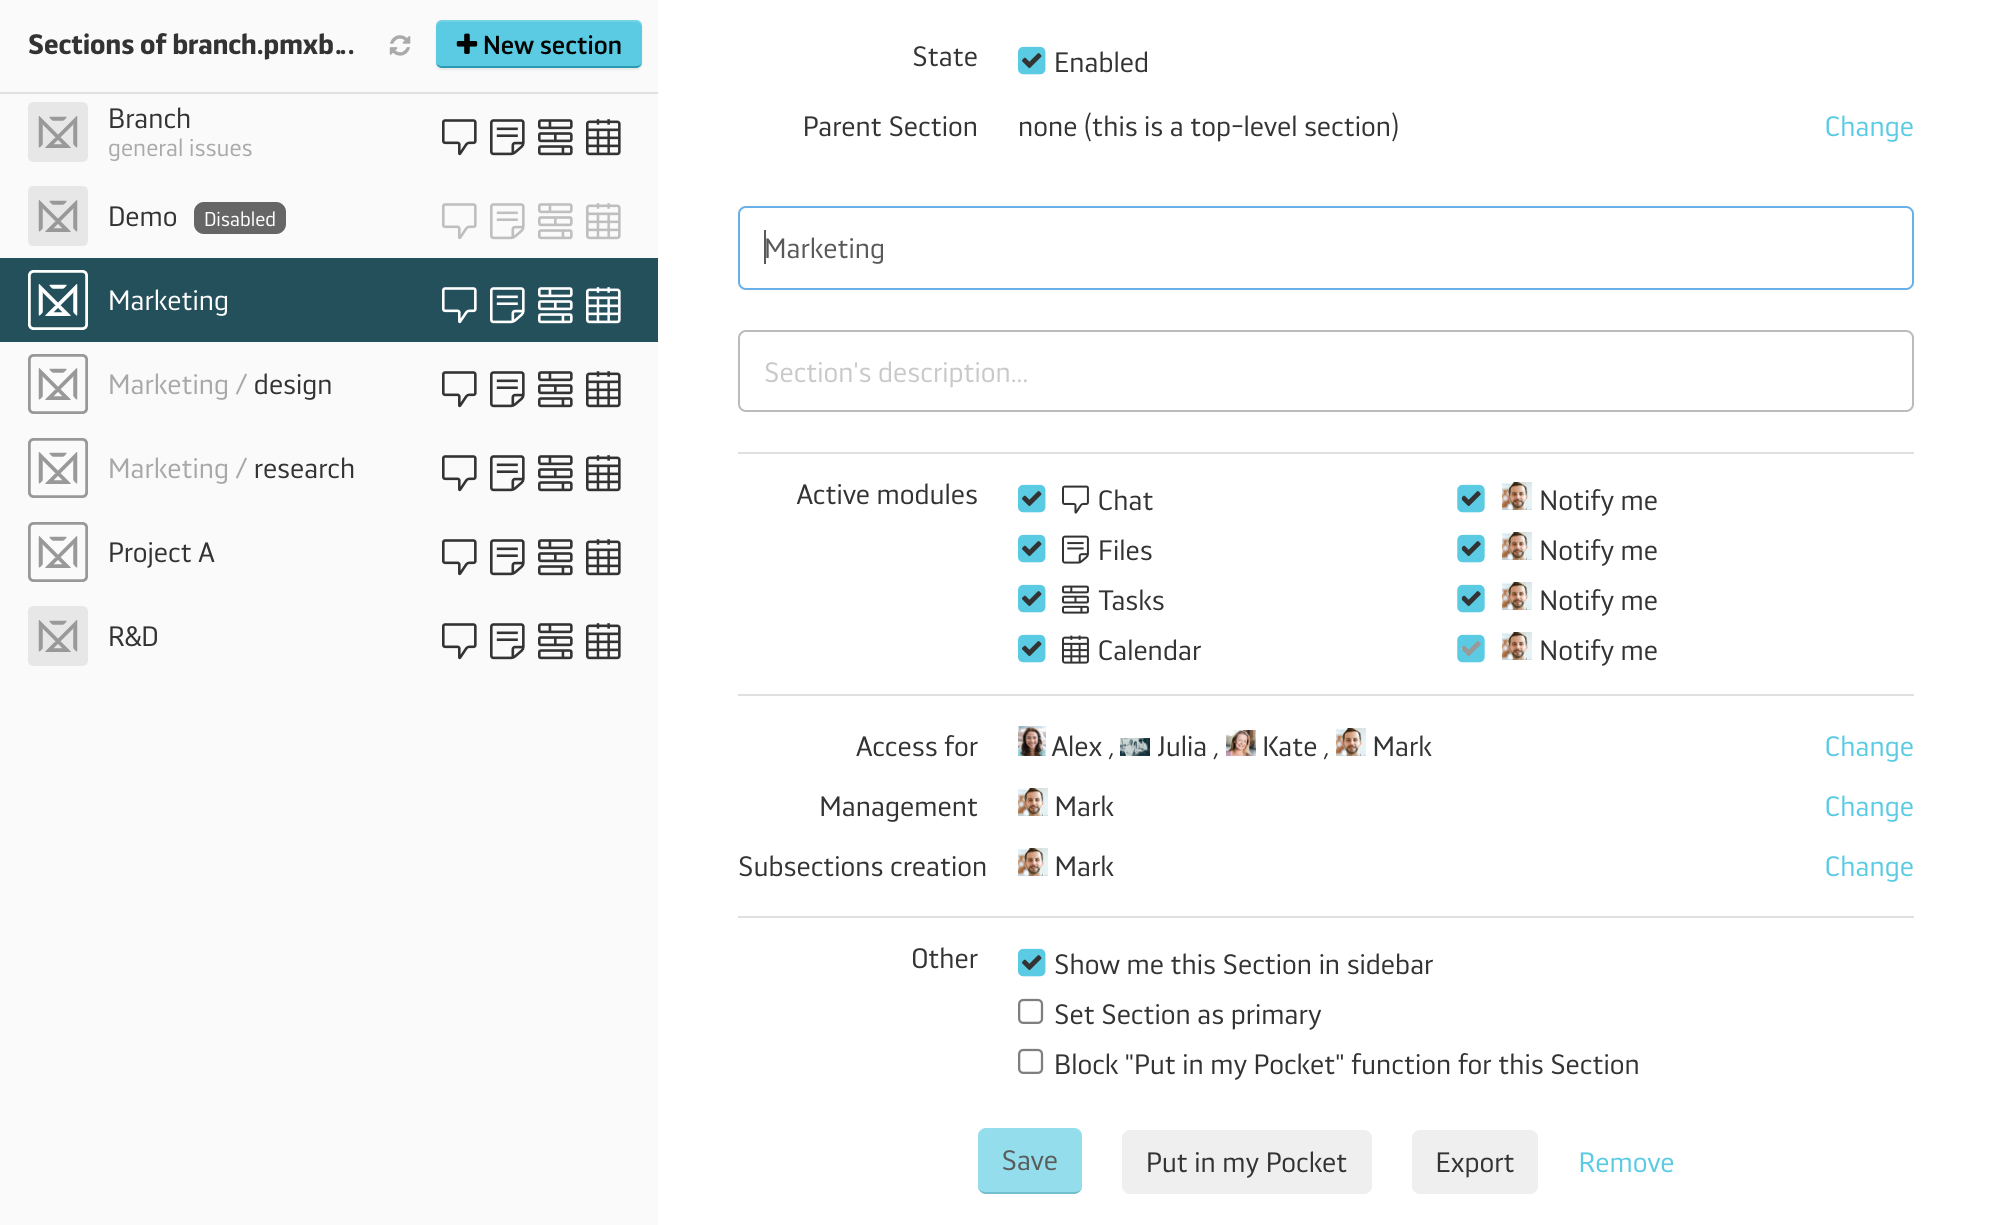
As you can see above, this is where you can:
- rename your sections;
- enable active modules (Tools – not every Section requires Calendars or Files, so you can adjust them to your Team’s needs);
- allow other Team Members to access, manage and create Subsections of the particular Section;
- decide how you want the section to disply in your vertical Section menu;
- remove the whole Section;
- add a new subsection.
Each Team Member can also create a private Section, where no other Team Members can enter. It may contain private Files, Tasks, Calendar, to-do lists and kanban boards. Each item can be shared with selected Team Members anytime by its creator.
Entering Sections through the initial app window
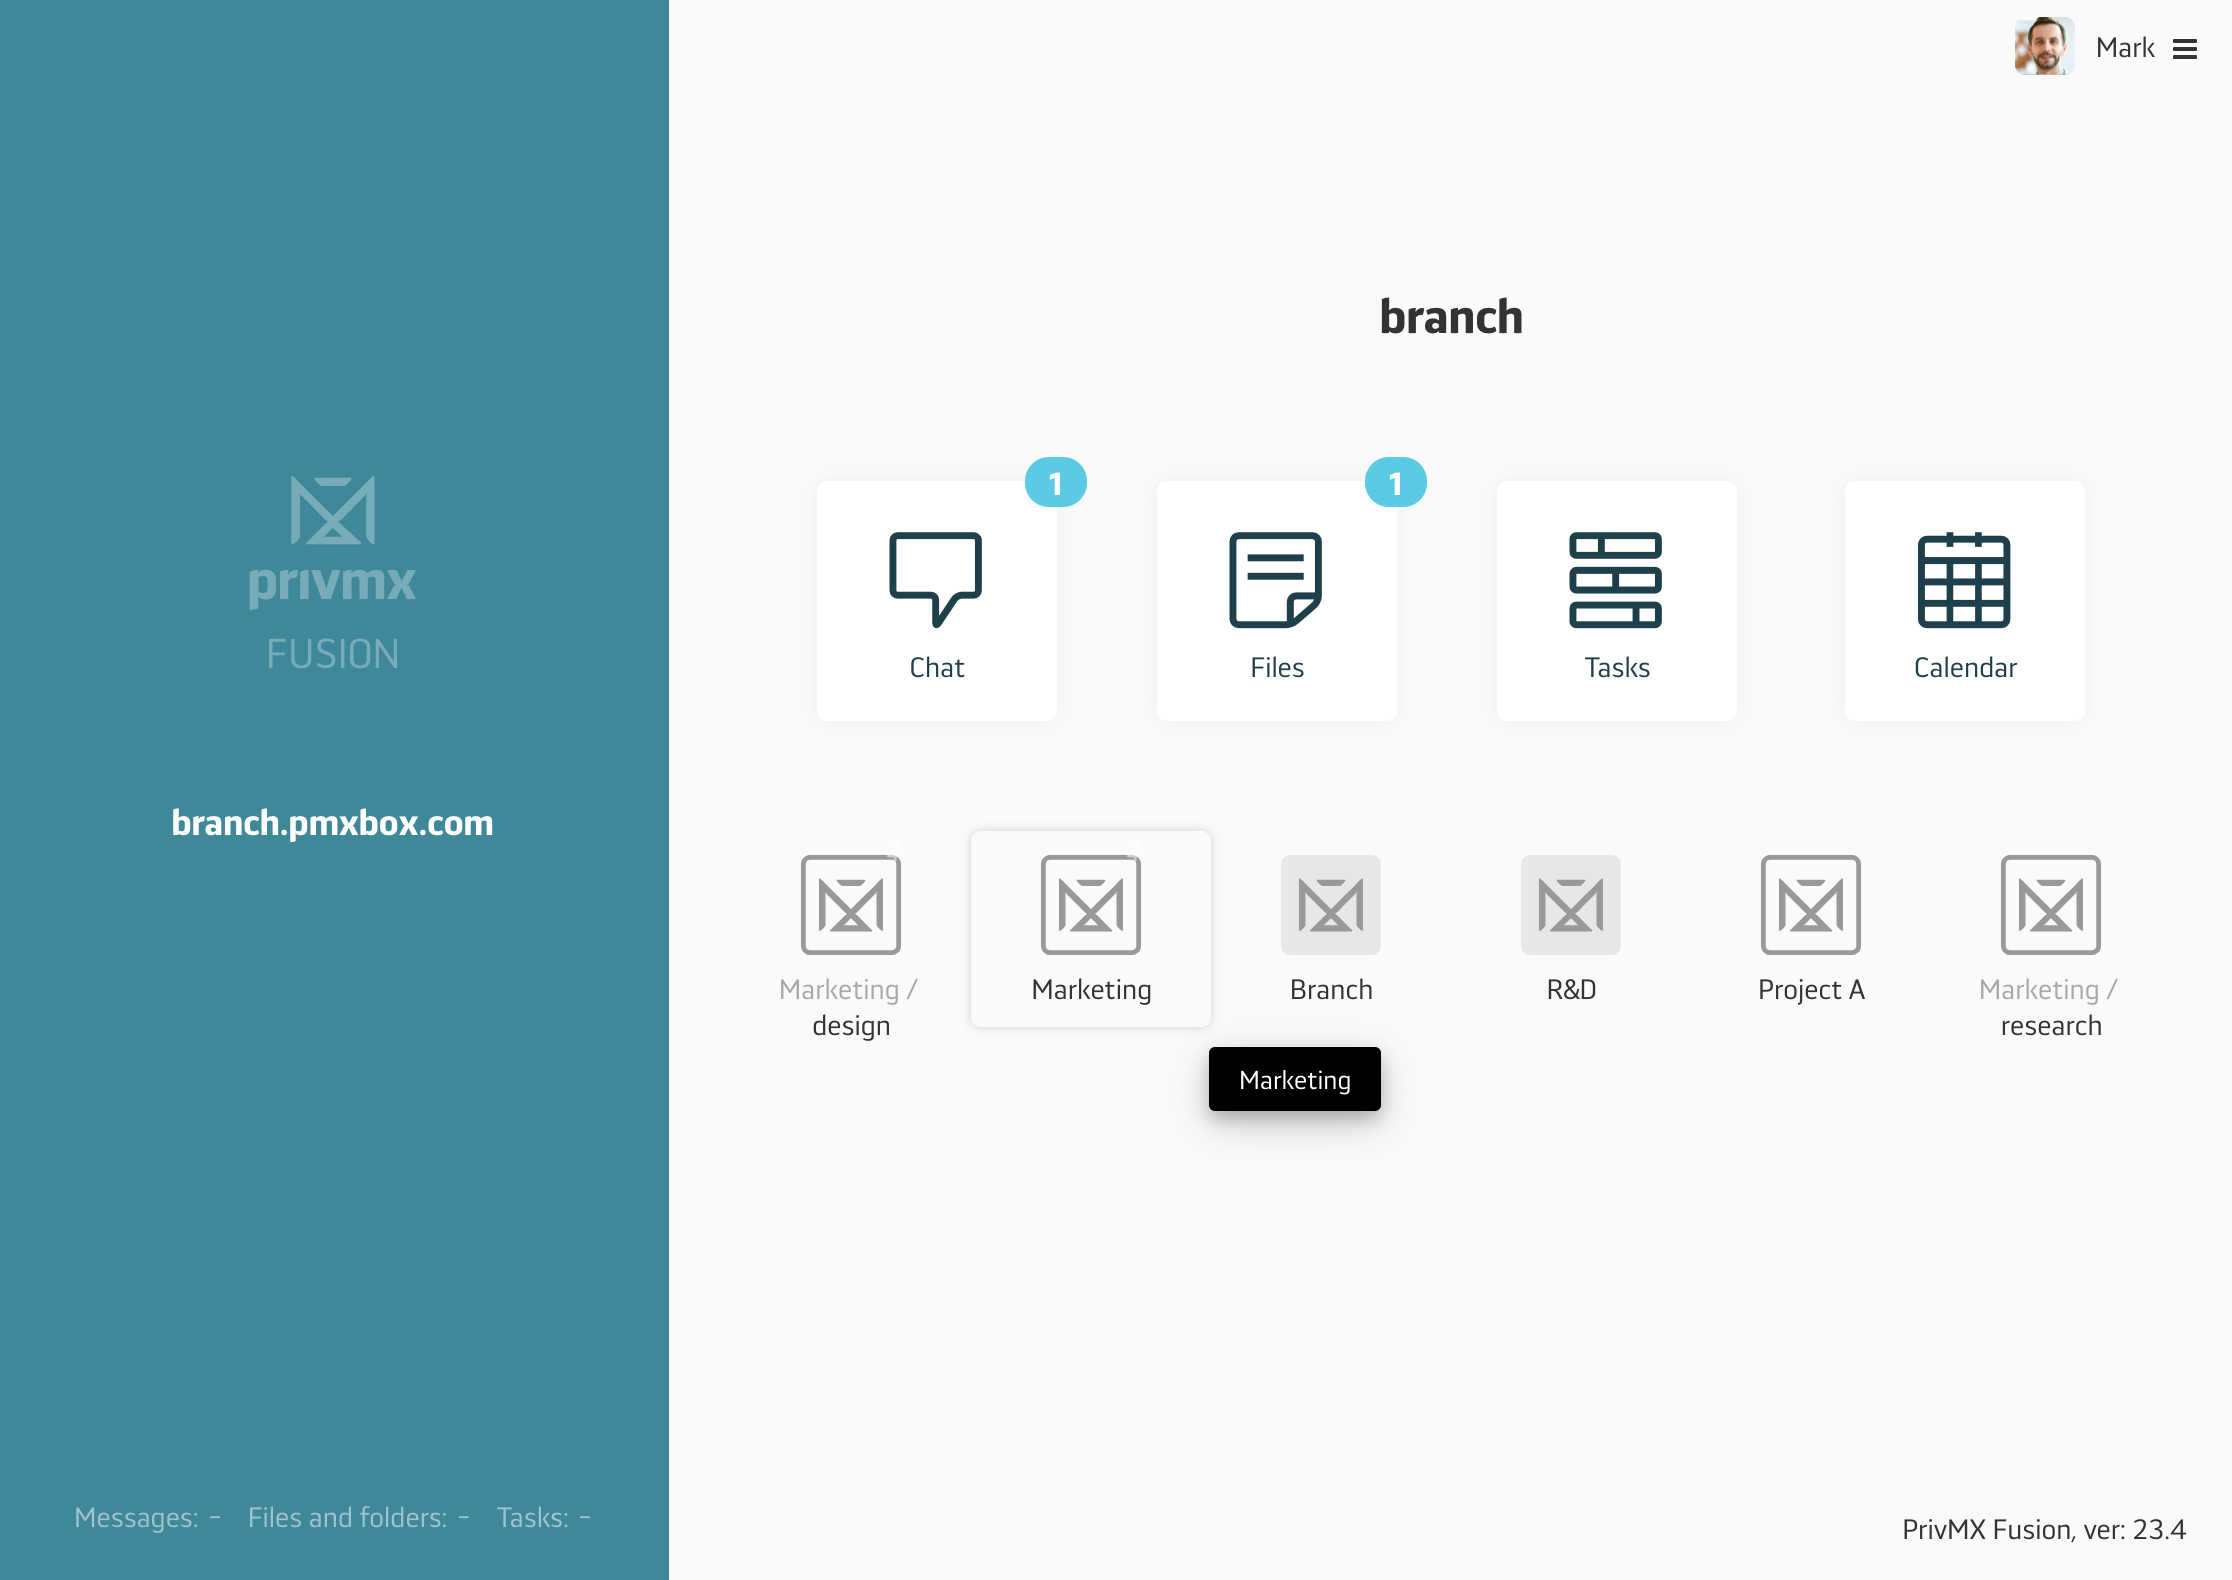
You can access any particular Section right after you log into your PrivMX Fusion workspace. The initial window allows you to enter your Team Server any way you want, including through a Section. Just select one from the list below the Tools icons:
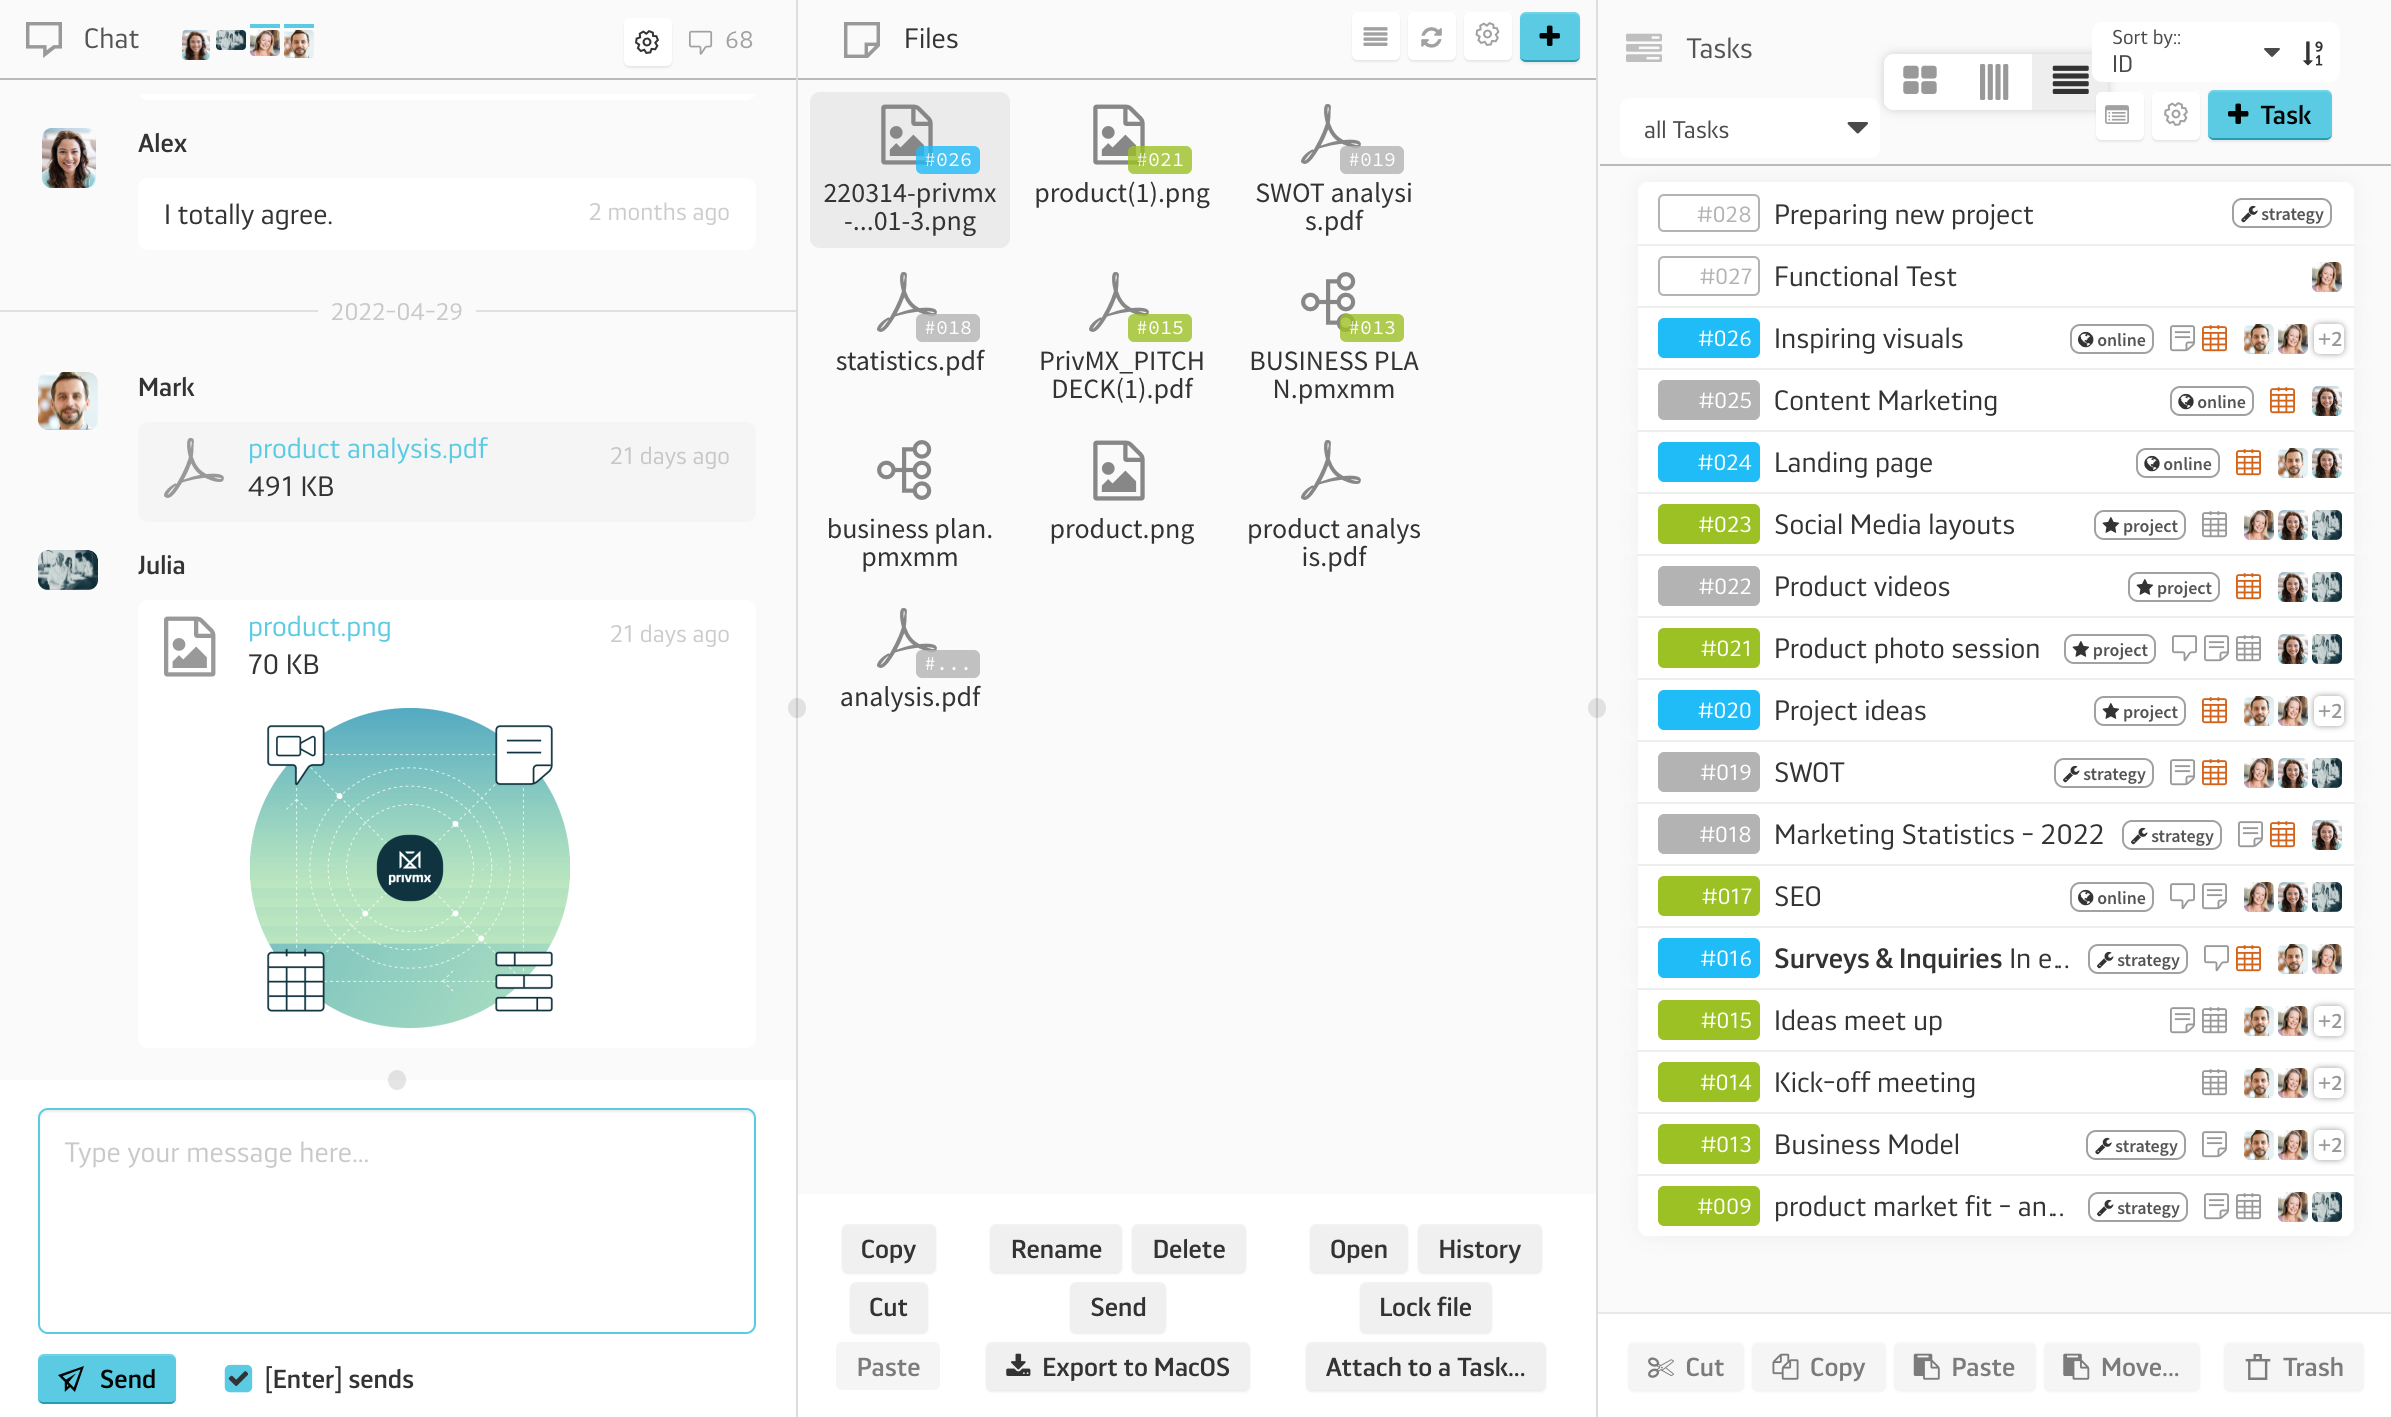
After clicking a selected Section, PrivMX takes you straight into its feed, where you can see its inner Chat conversations, Files, and Tasks:
** Entering Sections through the sidebar menu **
After you enter your Team’s workspace, Sections are always displayed in the sidebar menu on your left. Note that you can always access each Section’s settings straight from the menu – simply by clicking the Settings/Gear icon next to its name in the sidebar Sections menu:
Subsections
By choosing “New Section”, you create and name a brand new, Parent Section, that can be later developed into Subsections. To create a Subsection in any existing Parent Section, just click “+Add Subsection” in a selected Section.
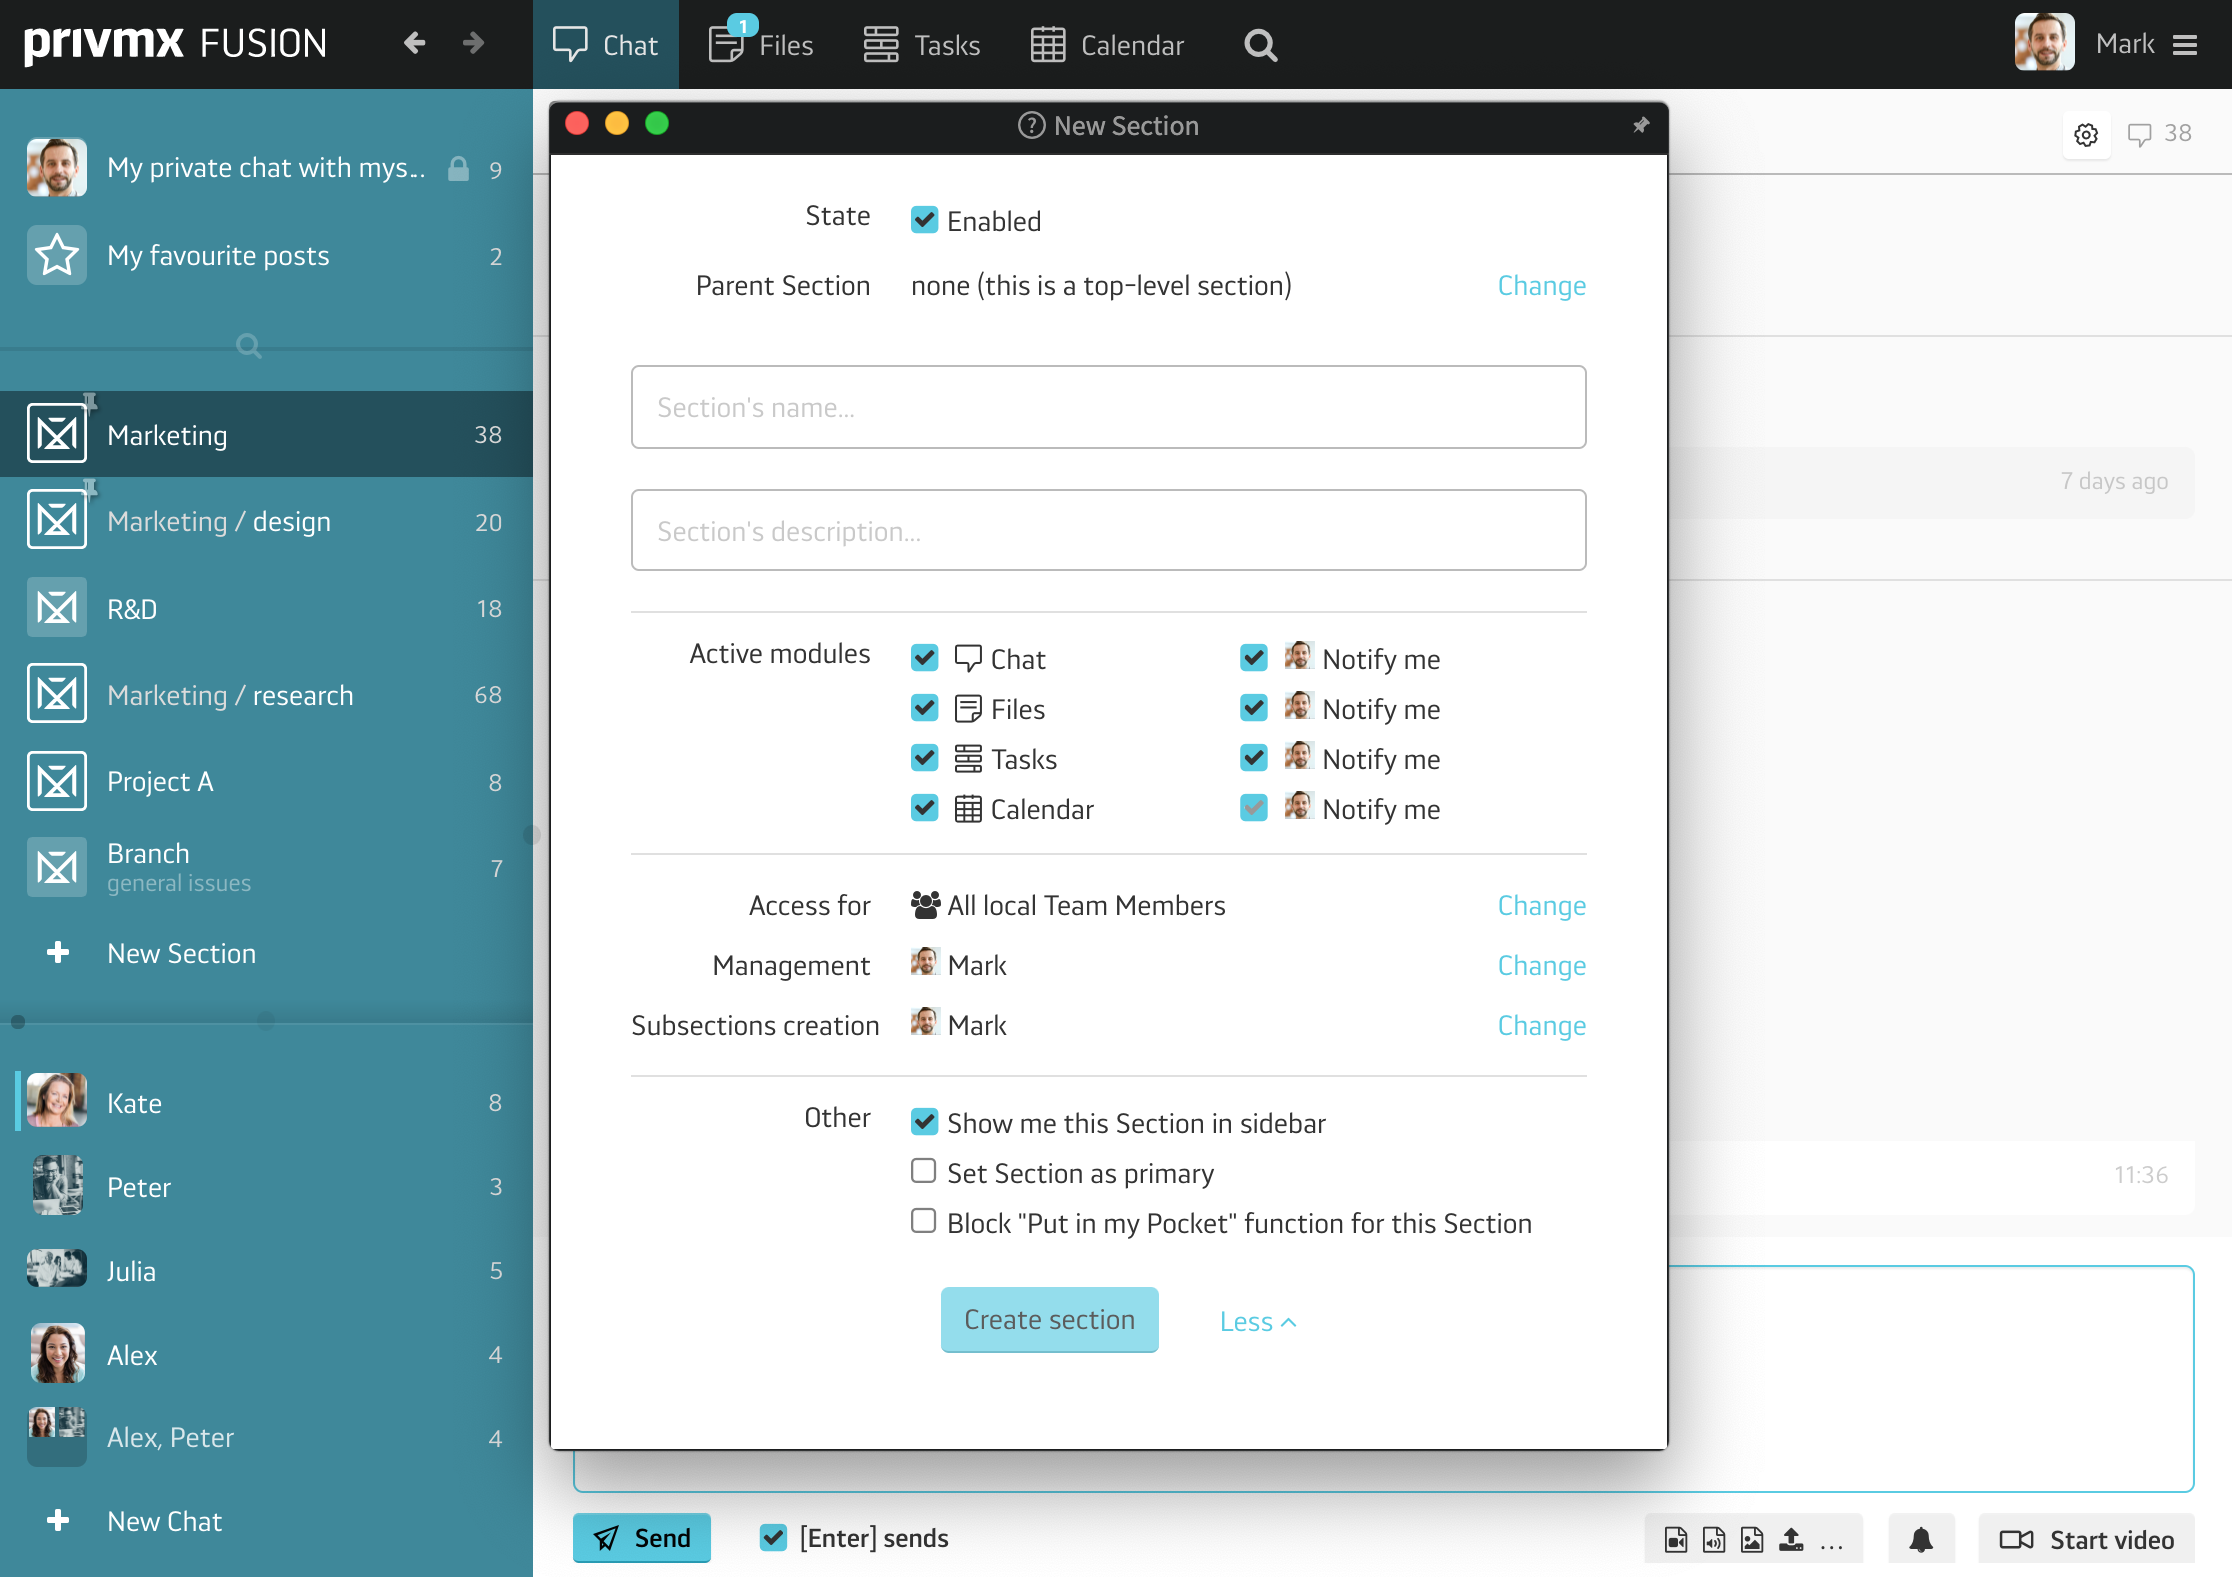
Parent Sections and Subsections may be adjusted according to your (Team Keeper’s) tactics. Subsections are later displayed in your Section menu as follows: Parent section/Subsection (with Subsection always displaying in bold typeface).
You can decide whether you want the Section to be Managed (accessible only to the Team Members you select). This way you can arrange your team’s workspace according to your privacy policy and hierarchy. Note that all the content of each Section is still encrypted and can be accessed only by your designated Team Members.
The “Active Modules” feature lets you select the tools you want to use within the Section. Some sections, like “Lunch” ( an essential one in terms of keeping the team spirit alive ;), may not only need chat or file sharing. It’s all up to you.
As a Team Keeper, you’re able to manage access policy of each Section and activate its modules (Tools) for all other Team Members. To learn more about how you can adjust the workspace for your team, see our tutorial about Team Server settings.