What you’ll see here is the fastest way to start working within PrivMX Fusion – there’s no need for a separate server to host your data or to install a PrivMX Team Server Software on your own.
PrivMX Team Server is an independent, digital workspace, where all the data created and shared by your Team are stored. Neither the Team Server nor its admins have access to any piece of your data, as it’s a Zero-Knowledge construction.
Installing PrivMX Fusion
If you haven’t installed PrivMX Fusion application so far, start with following our instructions. After you’re done with the installation, open PrivMX Fusion on your computer.
A new PrivMX Team Server
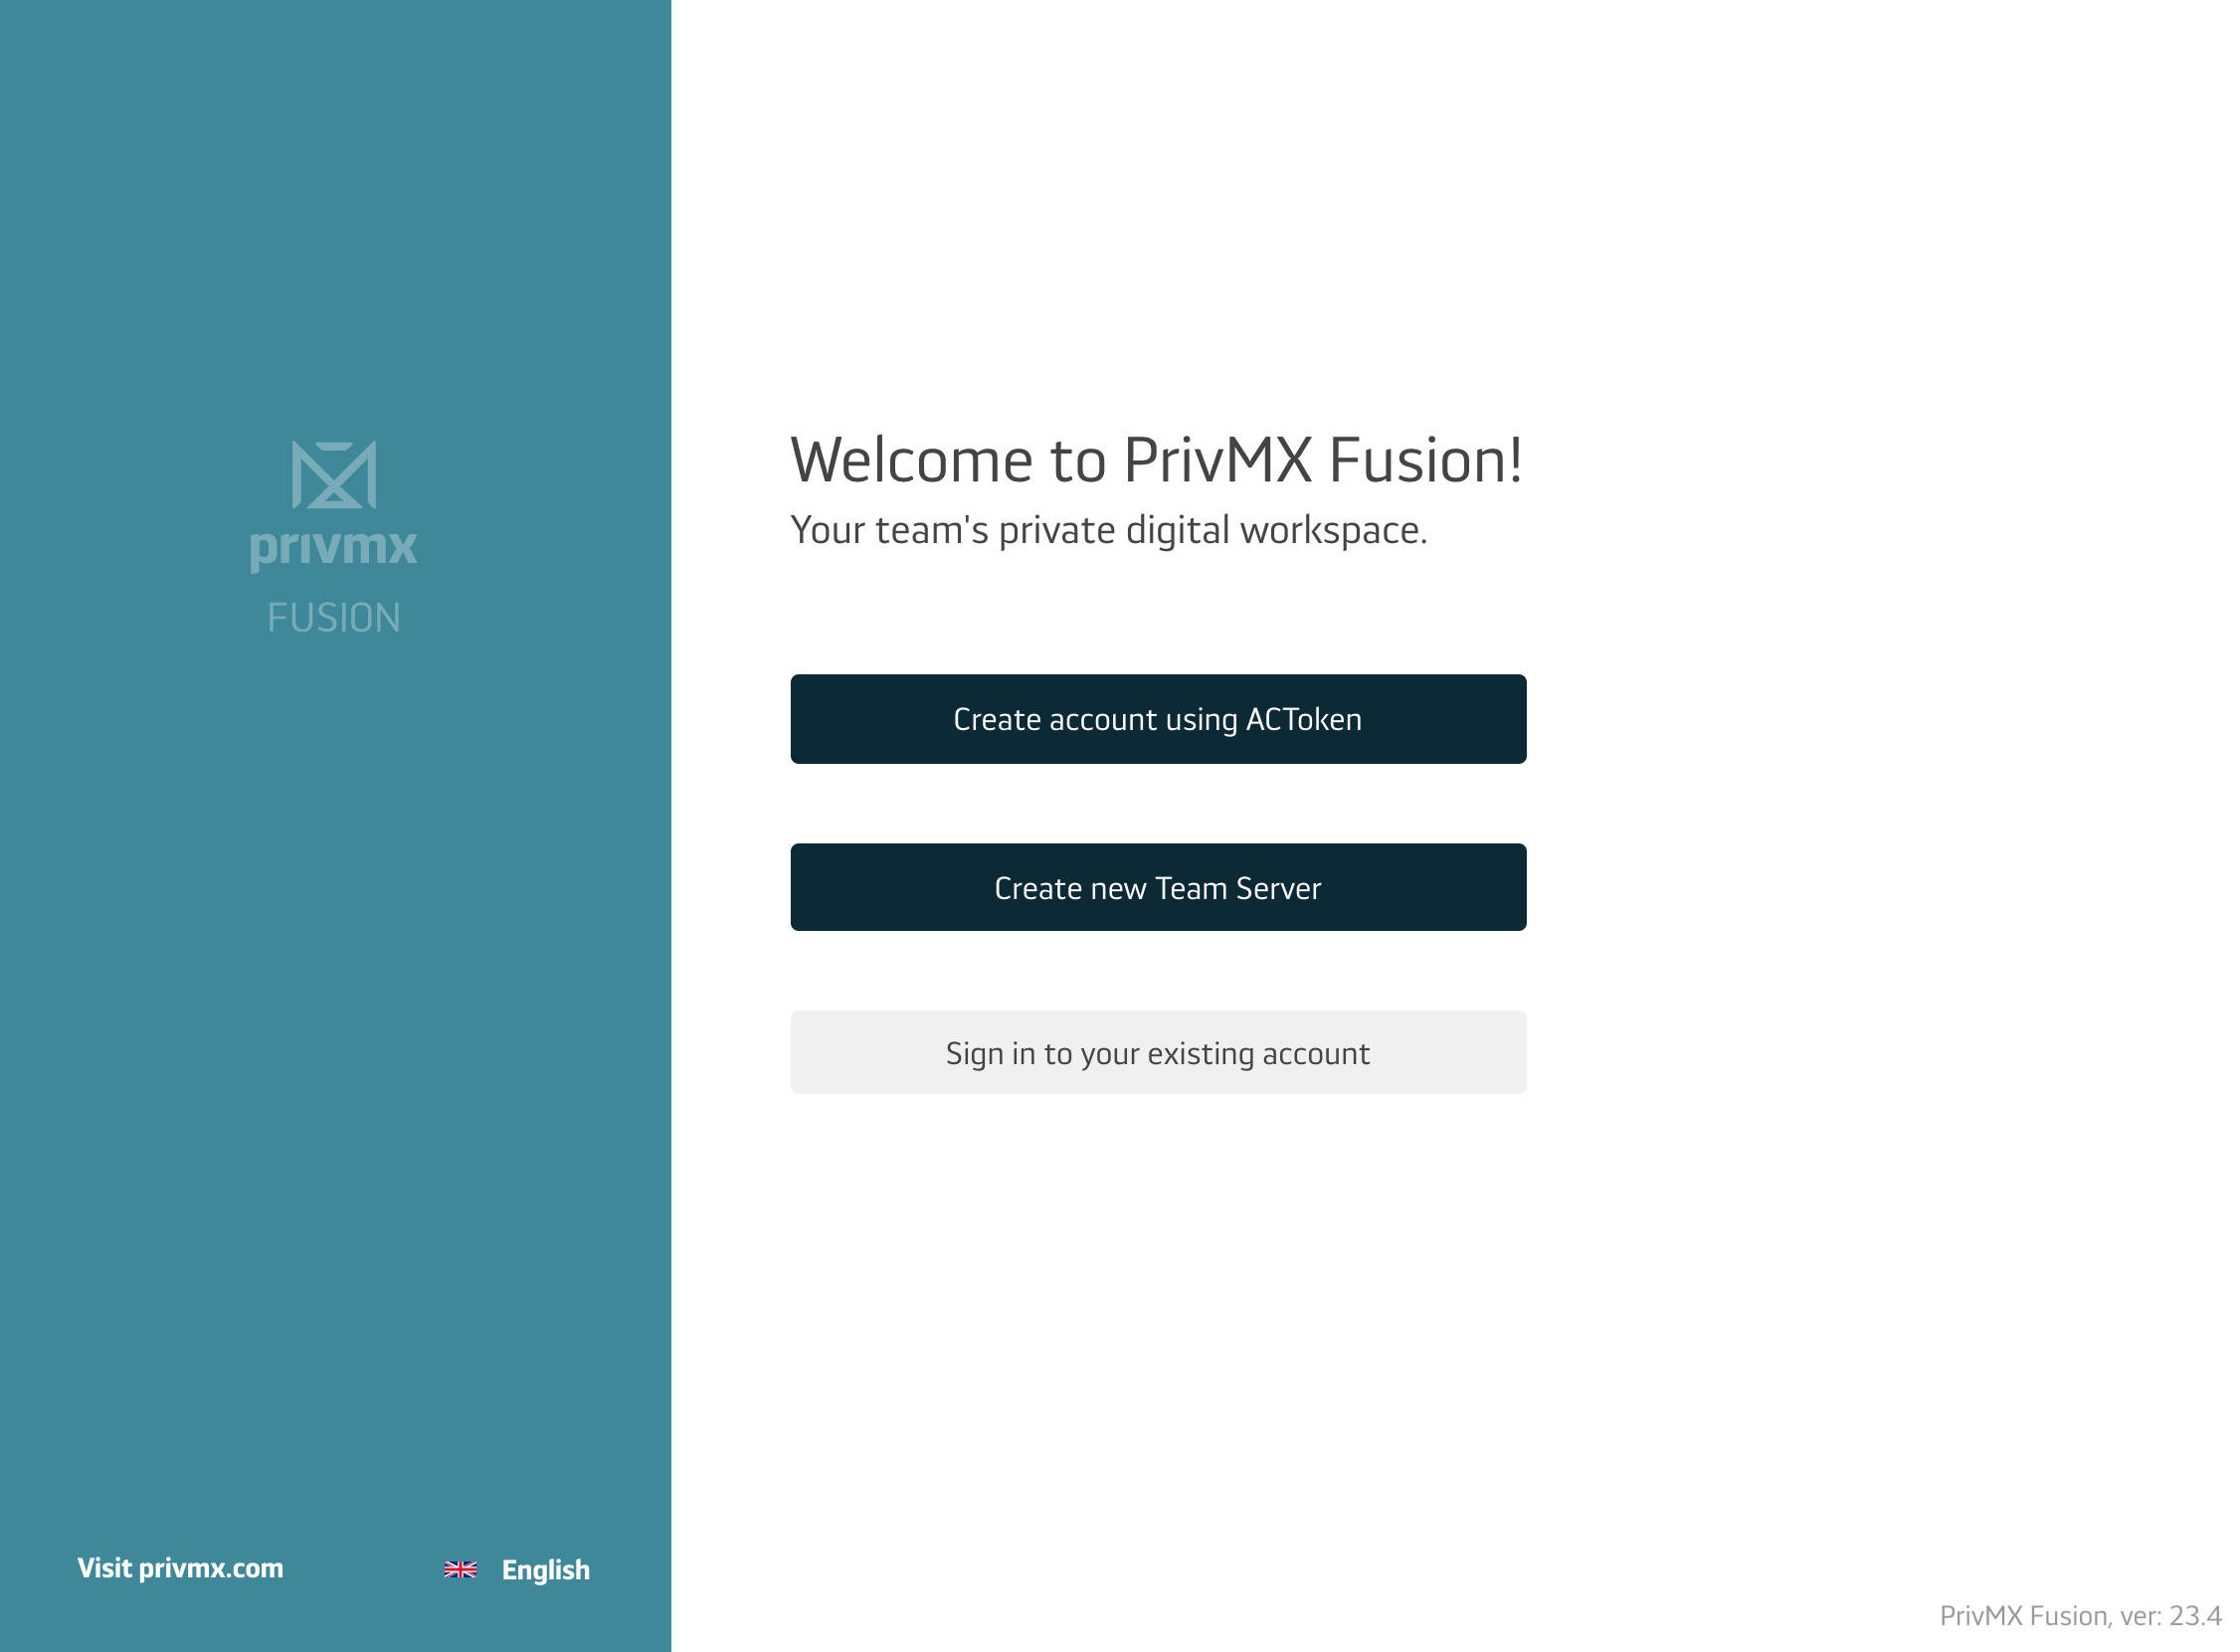
After you open the app, you’ll see a login screen. To start, choose “Create new Team Server”:
Next, you’ll see a form for you to fill with some basic information.
- Entering your email address please keep in mind that we’ll send a verification code there.
- Choosing the name of your Team please note that from this moment on it will make part of your new server’s address and become a part of all your Team Members’ logins – so make sure to make it short.
- Choose the location of your server – the city in which your data will actually be stored (our company uses data centres in numerous cities).
- You can set up an empty server, or one with demo content, which can be removed anytime in the future. After you accept the TOS and Privacy Policy, click „Continue”:

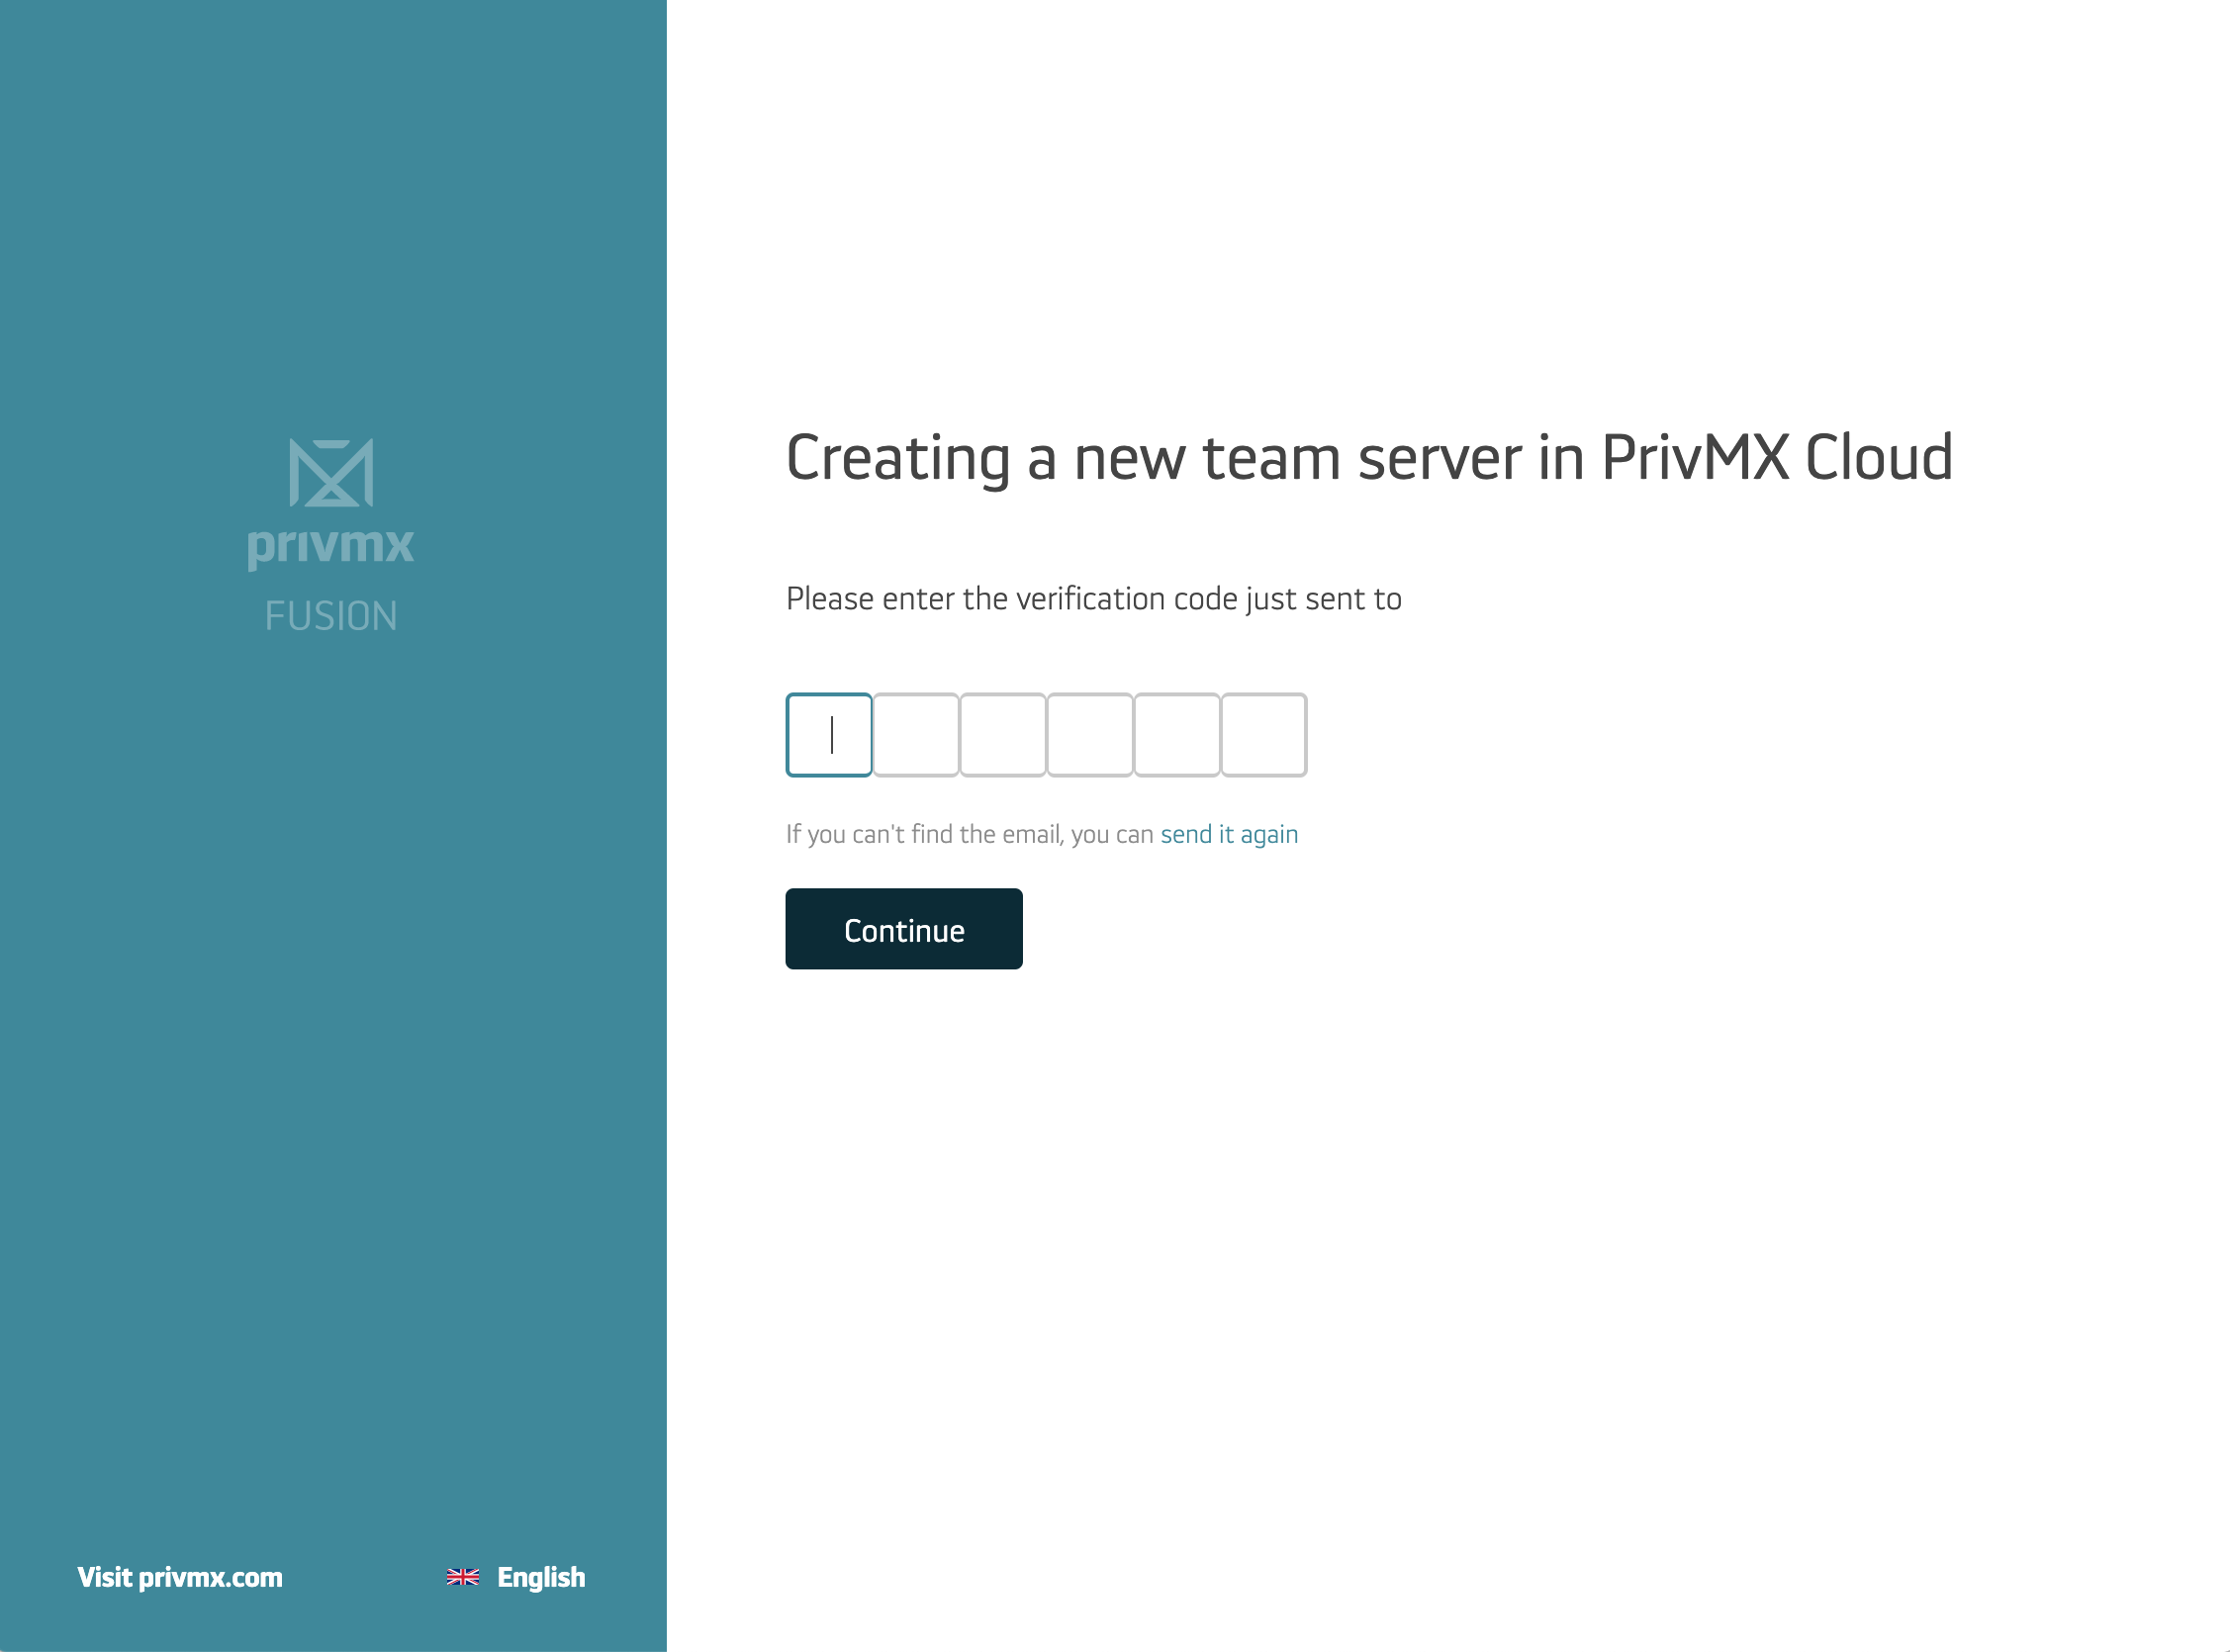
You’ll get a verification code in your inbox. Copy it here and click „Continue”:
You’re almost done! Just one step to go:) Click „Continue”:
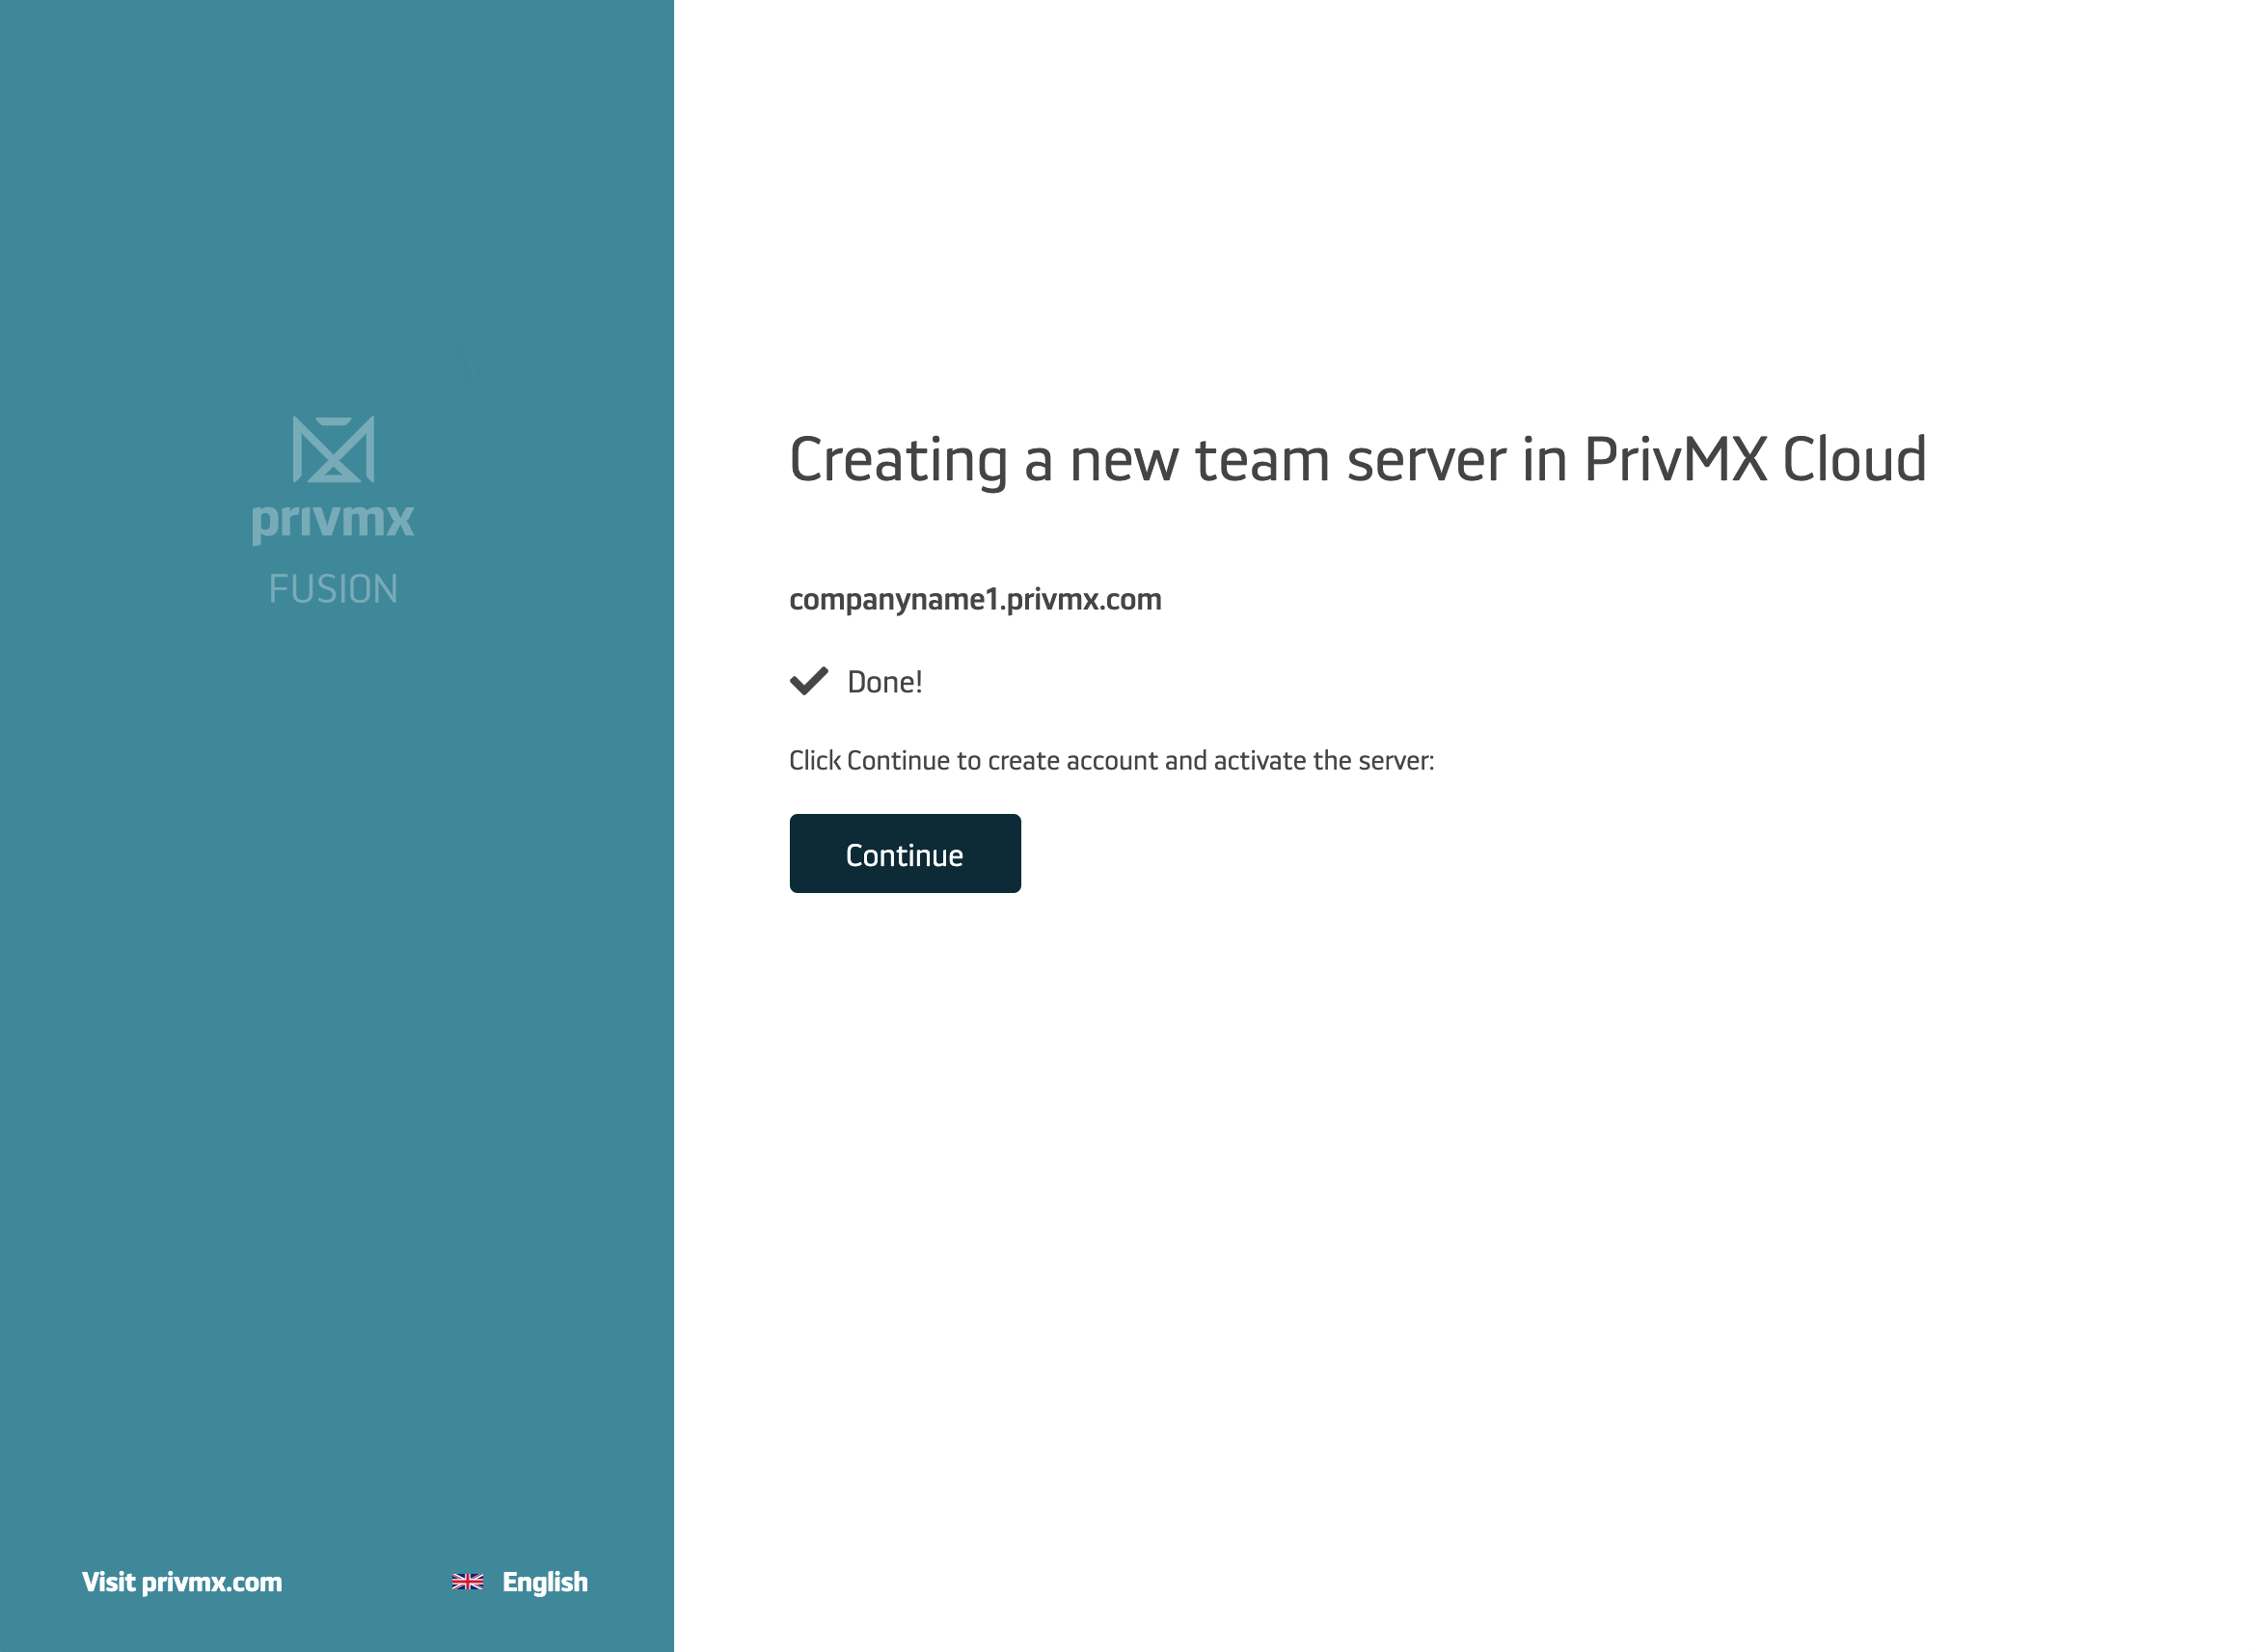
Now you have created your first Team Server! It will be activated as soon as you create the first user account (Team Keeper).
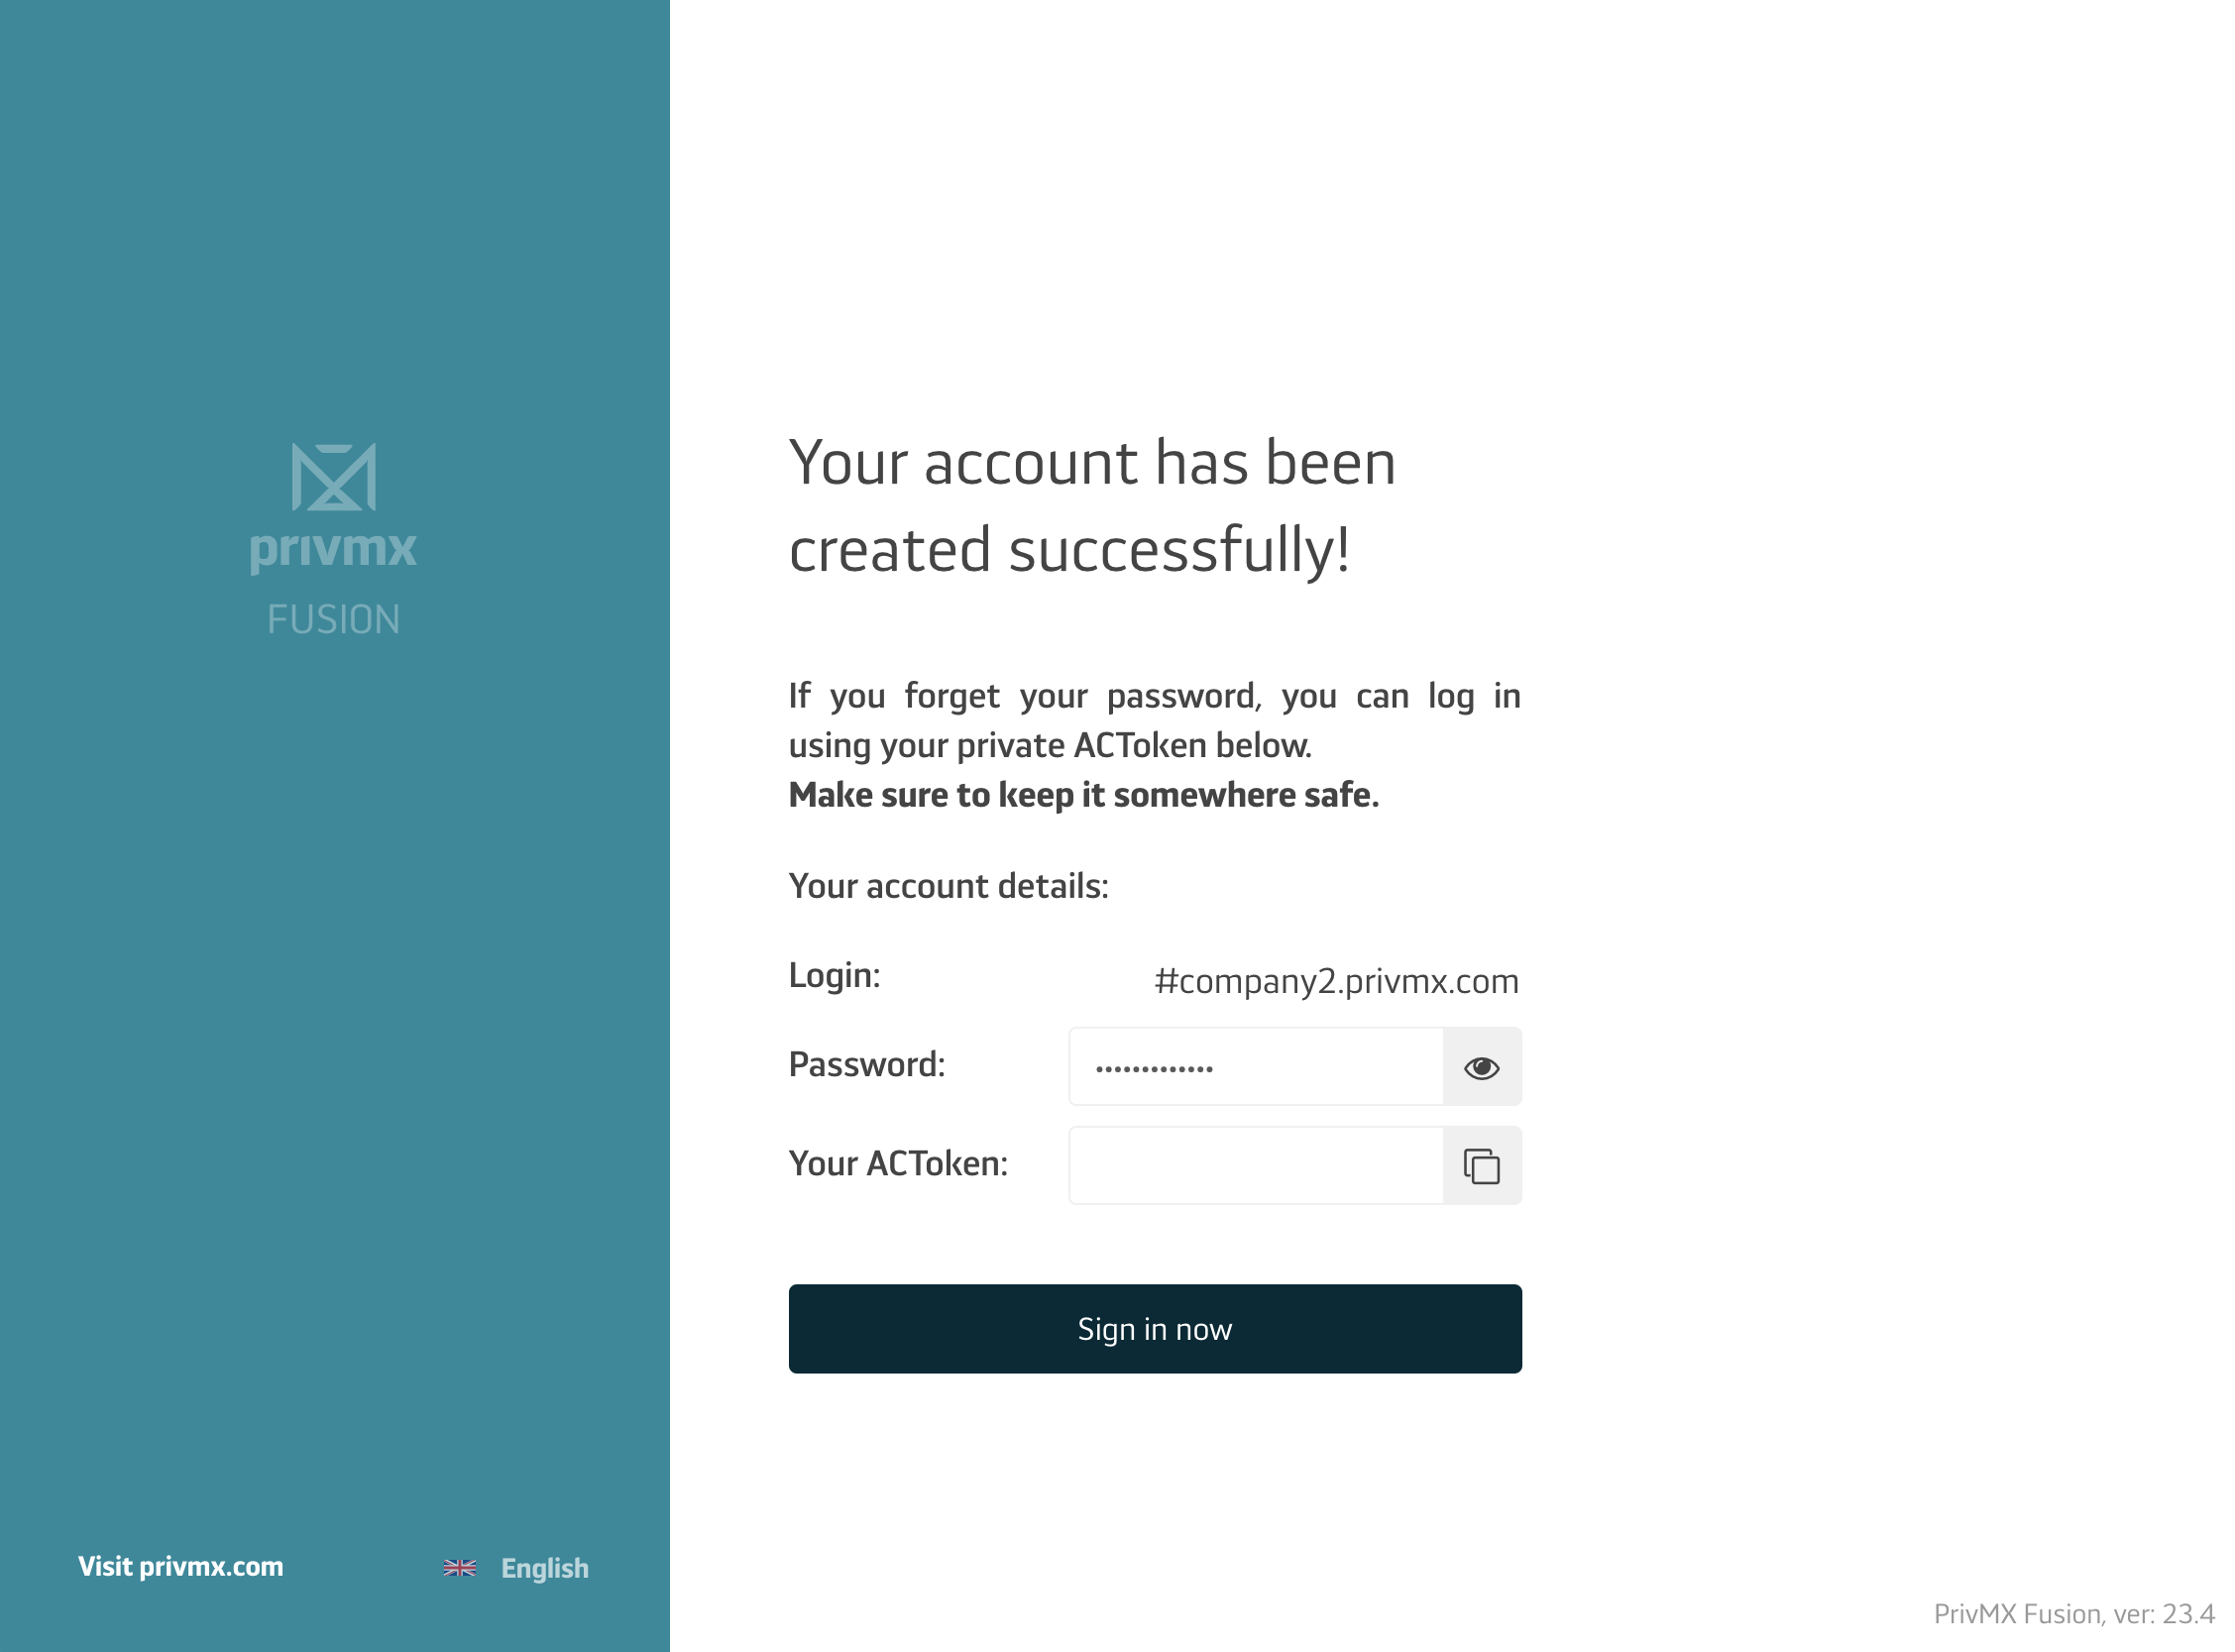
IMPORTANT NOTICE: memorize your password! Your account is primary and private, so if you lose your password, we won’t be able to reset it. If you forget your password, you can log in using your private ACToken. Make sure to keep it somewhere safe.
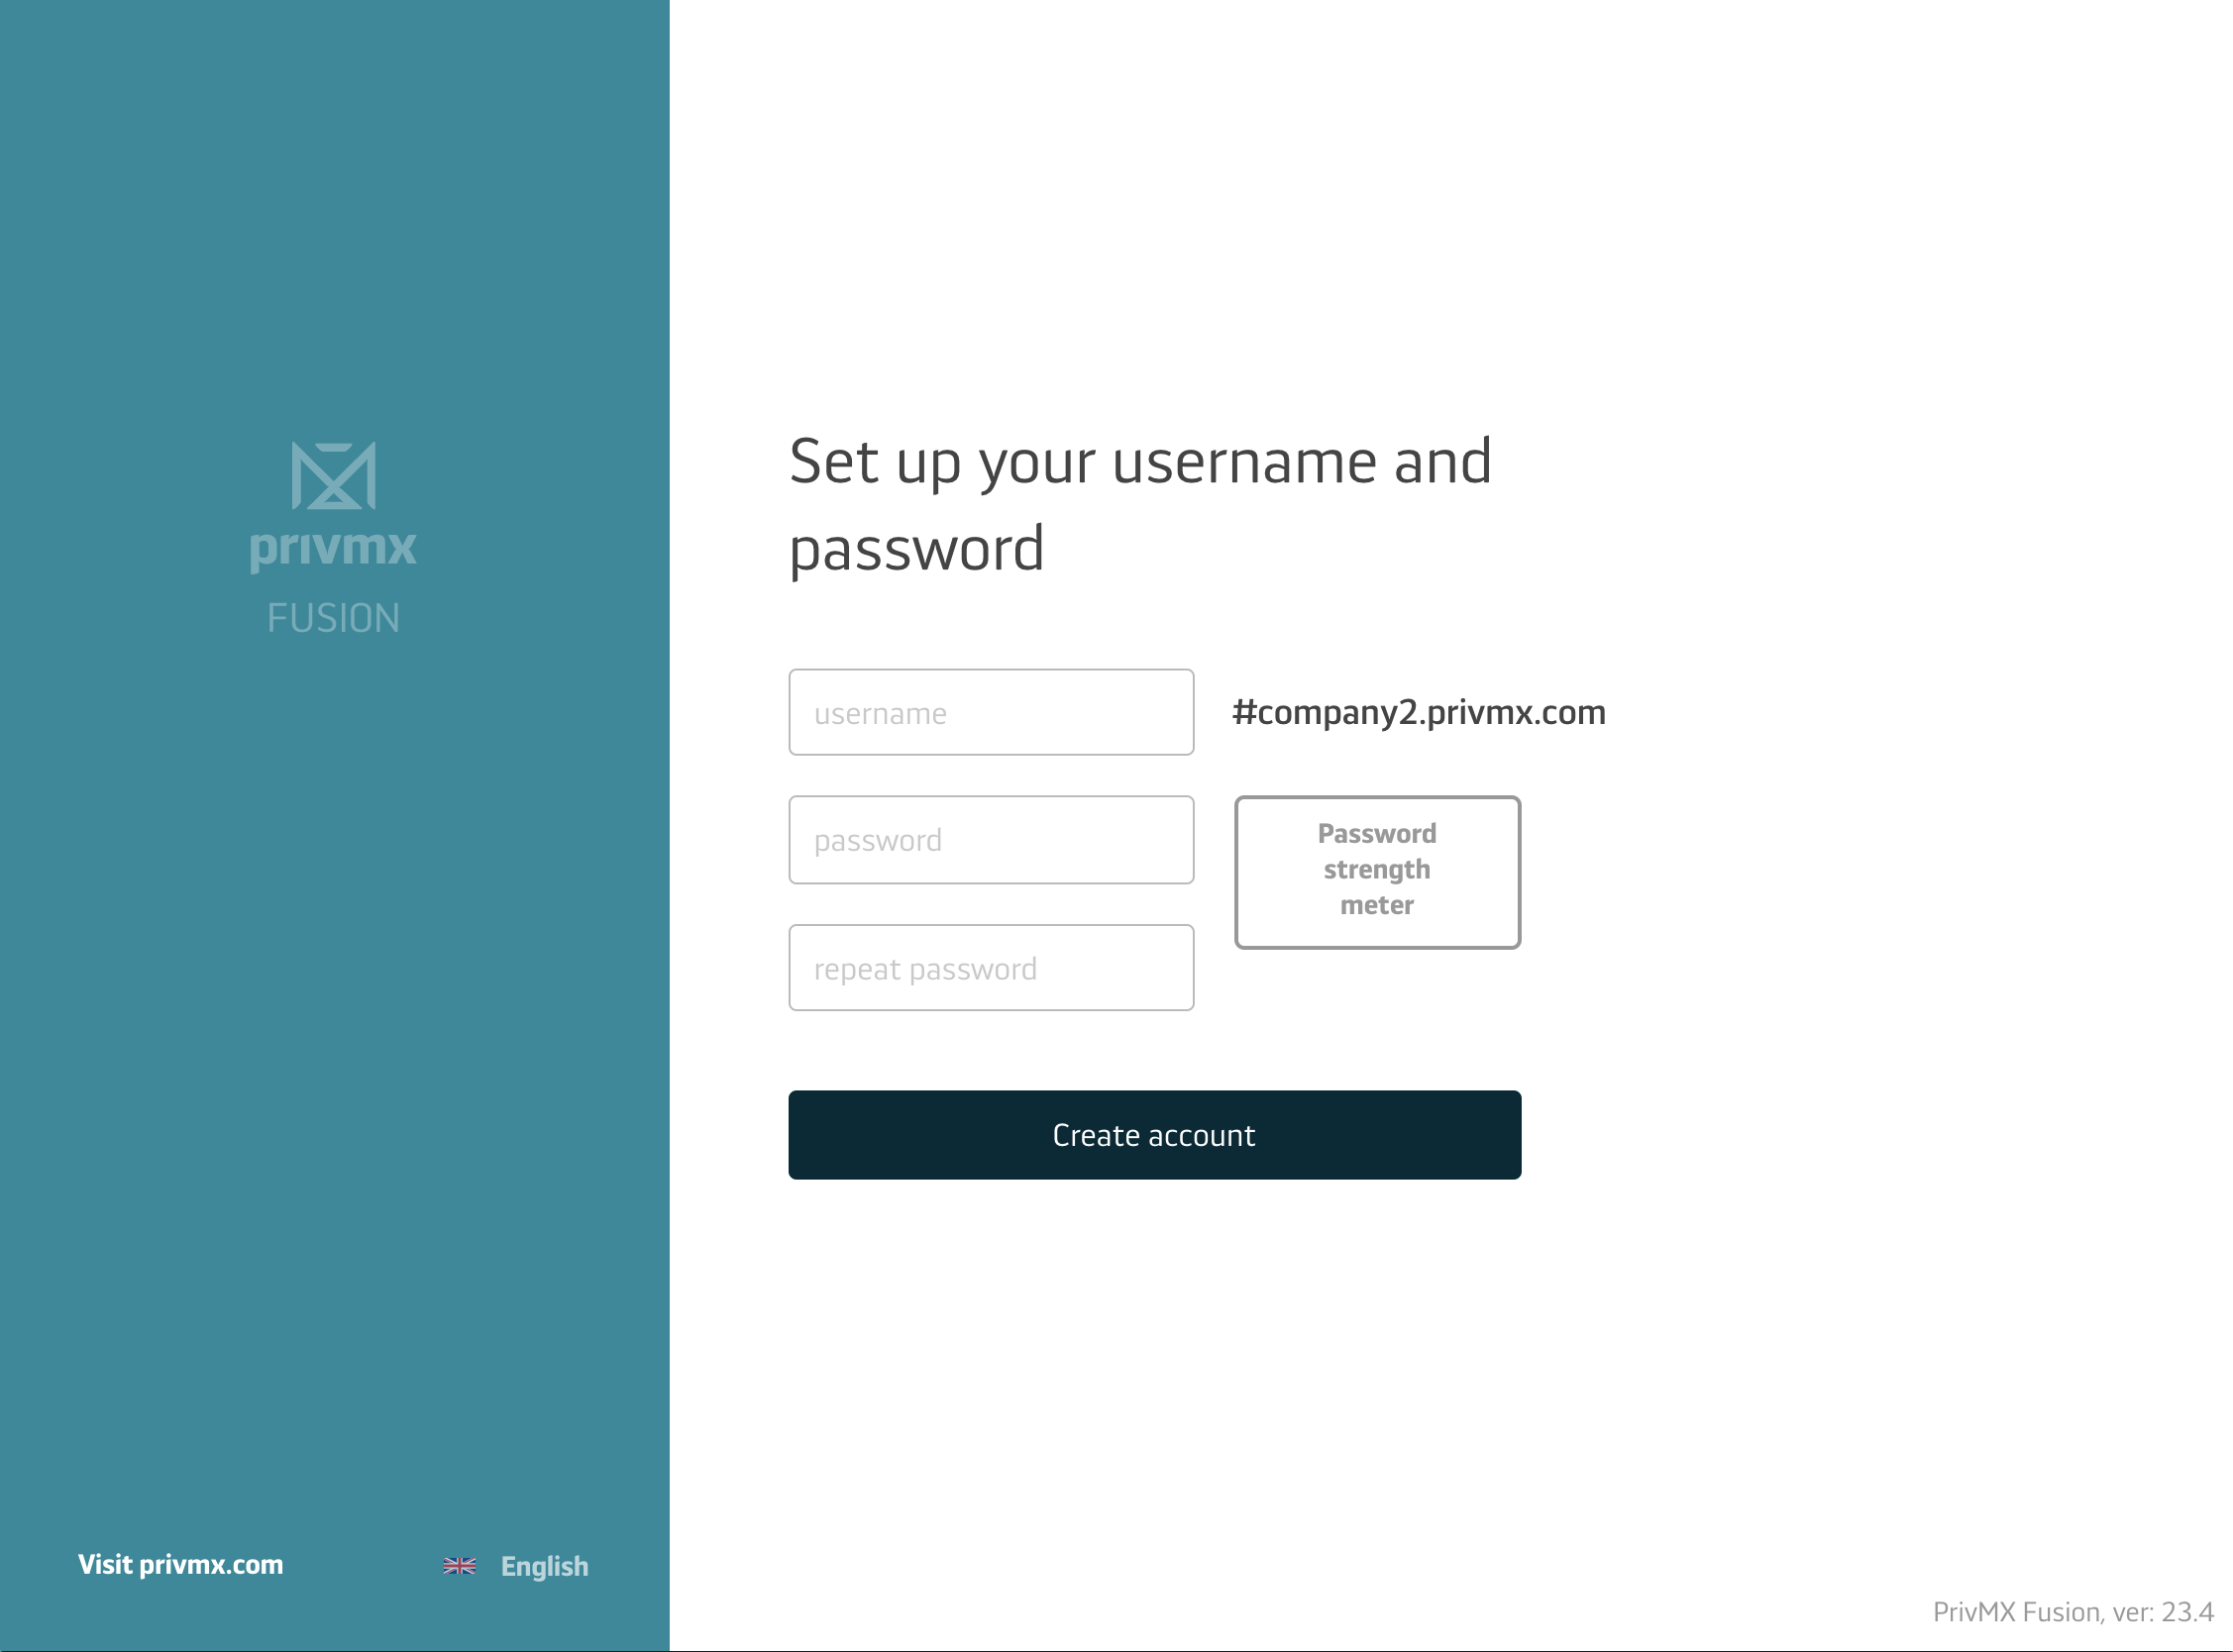
After you fill in all the data, click „Create account"
It’s ready now!
Click „Sign in now” and log into your new PrivMX Team Server.
You can now start inviting your colleagues to PrivMX Fusion, you’ll learn how to do that in our next tutorial.